
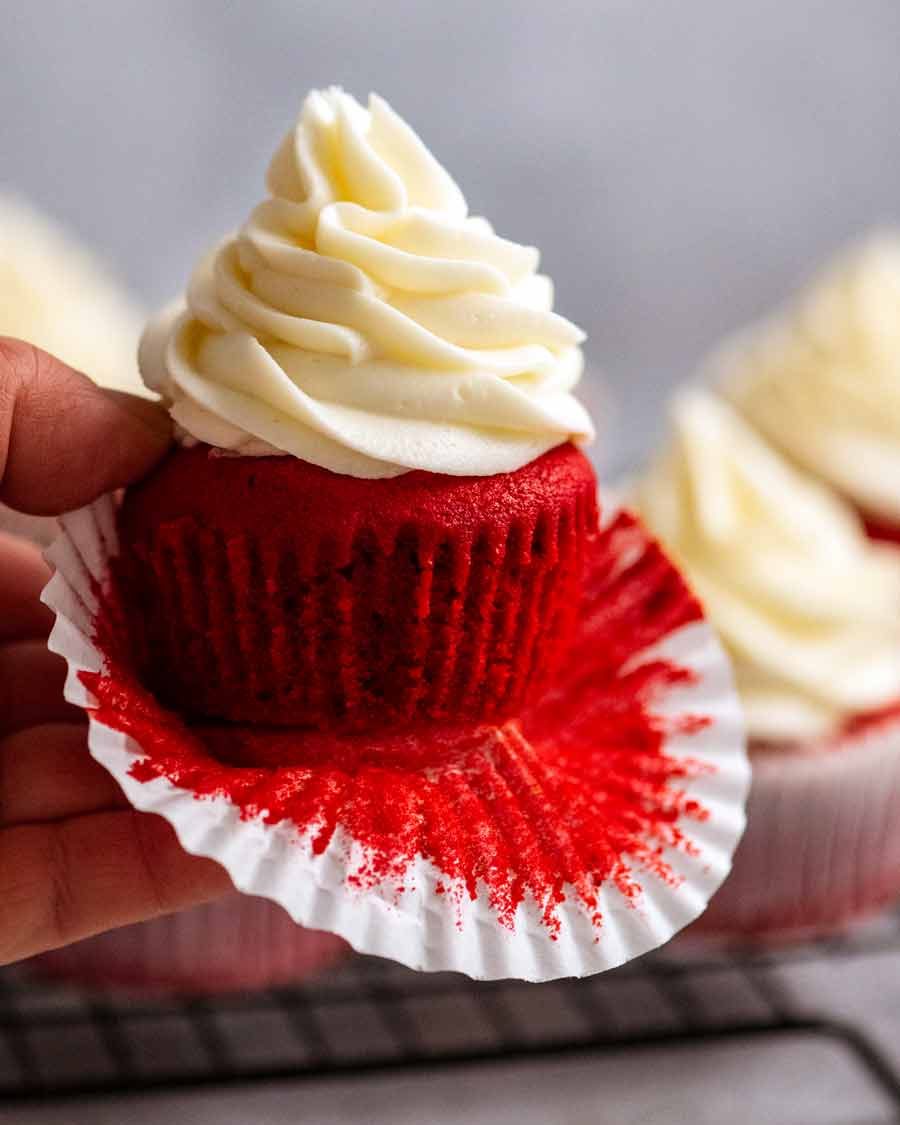
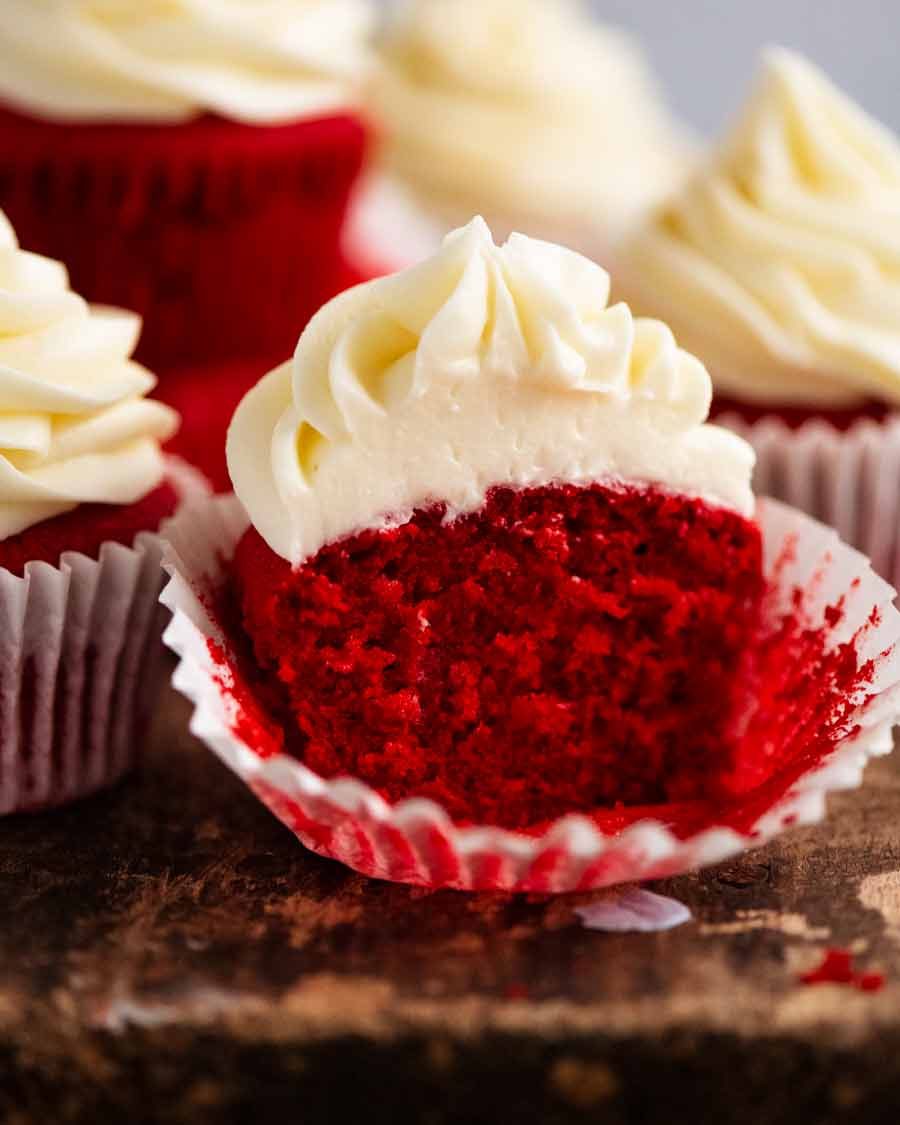
Ever wondered how Red Velvet Cupcakes got their name? It’s the crumb, for one. True to its name, this cupcake version of Red Velvet Cake is a striking scarlet colour that’s velvety and soft, with a hint of vanilla and chocolate flavour. Topped with fluffy cream cheese frosting, it loves to steal the lime light. And we happily let it!
Red Velvet Cupcakes
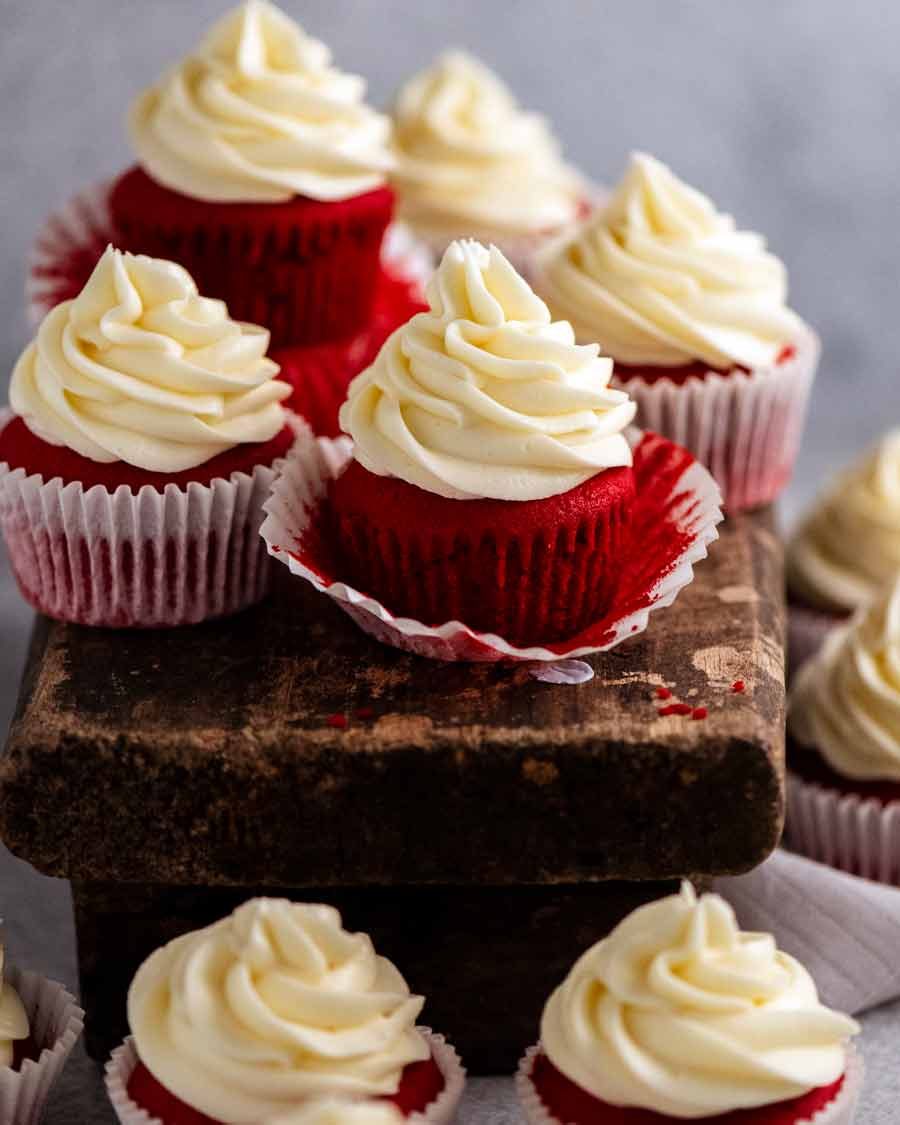
The eye-catching cupcake version of the iconic Red Velvet Cake taste like a cross between vanilla and chocolate cupcakes, and are piled high with swirls of fluffy cream cheese frosting. With a superior, buttery and “velvety” sponge, Red Velvet Cupcakes are THE treat to make when you want to be the talk of a gathering.
It commands attention – both visually, and by virtue of pure deliciousness. And just think: No matter how crowded the pot luck buffet table is, everybody’s eyes will immediately be drawn to YOUR cupcakes. Because how can one miss these? (Answer: You can’t!)
Ingredients in Red Velvet Cupcakes
Here’s what you need for the Red Velvet Cupcakes. You might be wondering – vinegar? Why oil AND butter? And is cake flour really necessary? Read on to find out the answers!
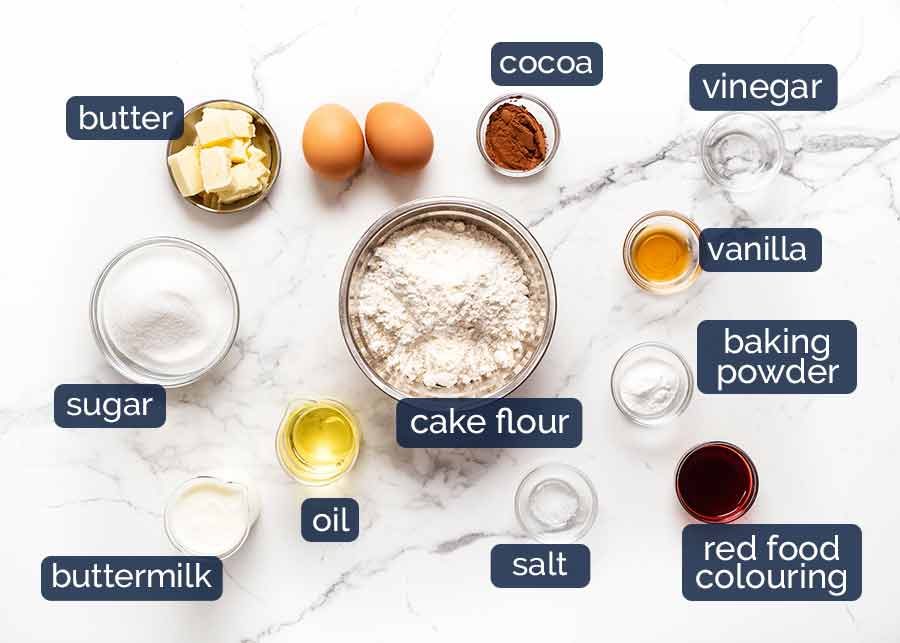
Cake flour – This low protein flour is specifically to make the crumb of cakes more tender. For Red Velvet Cupcakes, it also makes the dome more nicely rounded compared to using plain flour (all purpose flour).
If you use plain / all purpose flour, the cupcake is still excellent, however, you will notice that the dome has a bit more of a peak to it. Not drastic or offensive, and it’s hidden under the frosting anyway!
My advice? Worth hunting down cake flour if you’re making this for a special occasion / wanting to show off. Otherwise, don’t make a special trip to the store.
Buttermilk – Fermented milk that is thicker than plain milk but thinner than cream, with a slight tang. An ingredient used in baking for flavour (the subtle background tang is a signature characteristic of Red Velvet Cupcakes), and to make cakes lighter because the acid in it helps tenderise gluten.
It is also commonly used in baking to make cakes lighter because the acid in buttermilk activates baking soda to make cakes rise. However, this doesn’t apply to Red Velvet Cupcakes because we’re using baking powder instead which already has acid in it to activate the rising power.
Don’t have buttermilk? Make it yourself. It just requires lemon juice or vinegar and milk! Directions in recipe notes.
Baking powder – To make the cupcakes rise! Note: I use baking soda for Red Velvet Cake. But for cupcakes, I prefer baking powder because it gives the cupcakes a prettier dome (baking soda gives it a slightly unsightly peak).
Vinegar – This is sometimes used in baking recipes that use baking soda as the leavening agent to make them rise, such as in my Red Velvet Cake recipe, because the vinegar gives the baking soda a kick start in the rising process.
However, it also plays a part in the tenderness of the crumb because acid helps breakdown gluten (as noted above in buttermilk). And interestingly, I found that using vinegar helps preserve the vibrant red colour in the cupcakes.
So even though we are not using baking soda in this recipe, vinegar stays in!
Oil AND butter – Yes, both are necessary in this recipe for best results! We love butter for flavour, but it doesn’t make things moist. Oil makes cakes moist but doesn’t add flavour. So use both!
Vanilla – Vanilla extract trumps artificial vanilla essence. Don’t waste vanilla bean on this recipe.
Cocoa powder – Just a bit, for the subtle chocolate flavour we know and love about Red Velvet! Standard cocoa powder is called for here, though the more intense flavoured dutch processed works just fine too.
Sugar – Caster sugar / superfine sugar works best here because it dissolves more easily into the batter. But granulated / ordinary white sugar can be used if that’s all you’ve got.
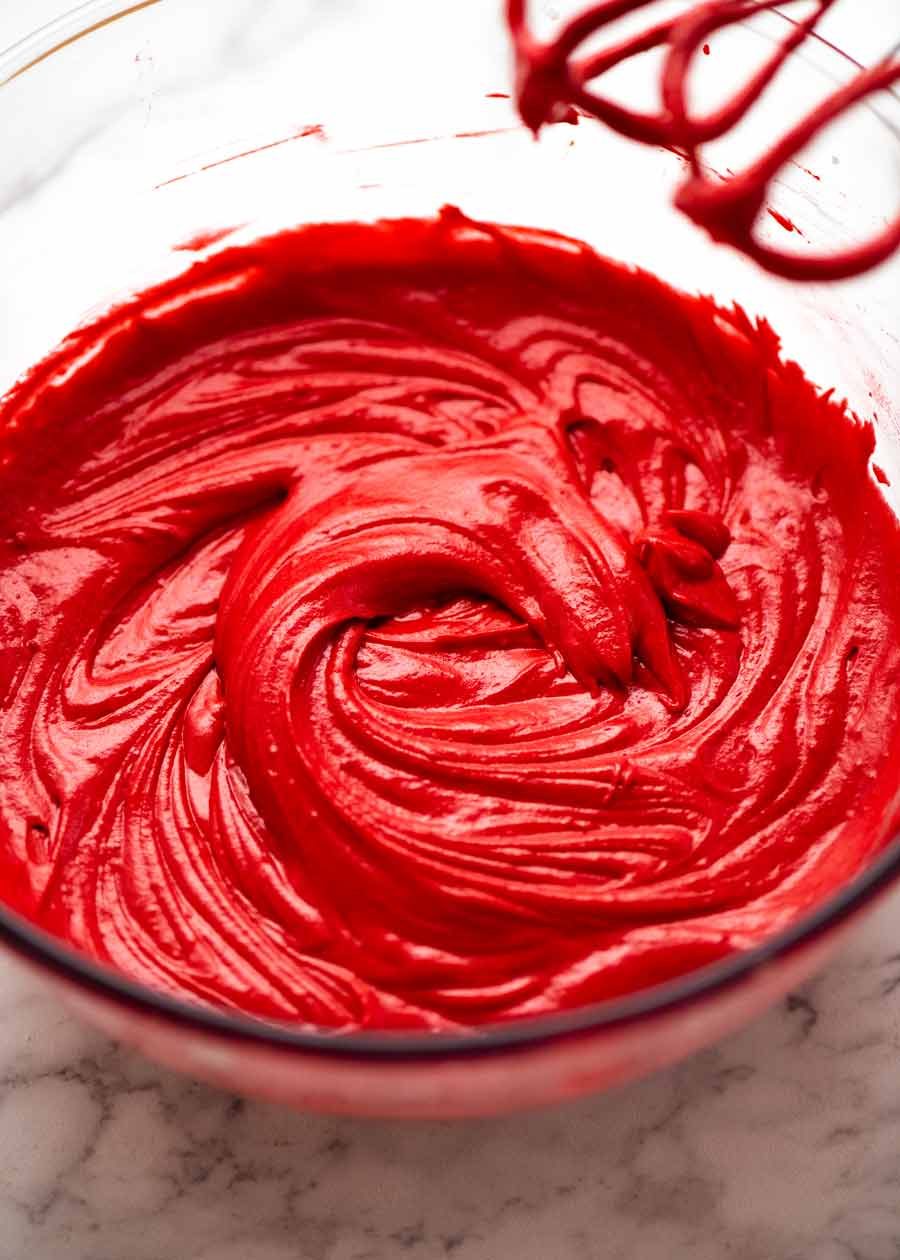
Red food colouring – To make the cupcake RED! Using ordinary food colouring (rather than intense gel) you need 1 whole tablespoon of red food colouring. If using gel, dip-and-smear a toothpick 3 times, and match the batter colour to the photos below.
Eggs – Make sure your eggs are at room temperature, not fridge cold, and are labelled “large eggs” which is an industry standard size in Australia and the US (55-60g / 2 oz each). The carton will be labelled as such.
Why do eggs have to be at room temperature? Because they incorporate better into the batter. Also, cold eggs mixed in with creamed butter makes the butter solidify again! Yep, been there, done that!
How to make Red Velvet Cupcakes
The making part is really no different to typical butter based cakes.
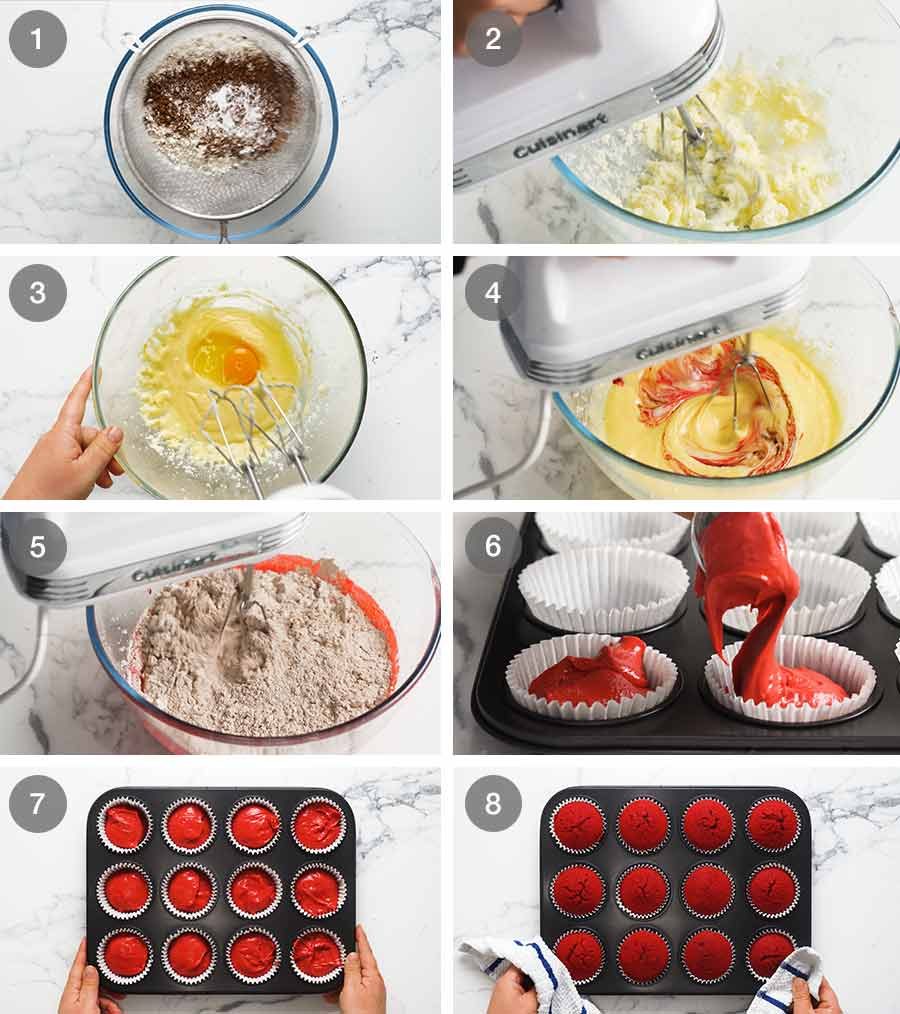
Sift the dry ingredients into a bowl so they’re lump free. I don’t like sifting, but in this situation, it’s necessary because cocoa powder has a tendency to get lumps in it.
Cream butter, then sugar – Cream the softened butter and beat with an electric beater or a stand mixer for 1 minute until it’s smooth. THEN add the sugar and beat for a further 2 minutes until it’s fluffy and the butter has changed from yellow to very pale yellow, almost white.
Eggs – Add eggs one by one, beating in between until incorporated.
Oil, buttermilk, vinegar and vanilla – Then beat in remaining wet ingredients until incorporated.
Add Dry Ingredients – Lastly, add the Dry ingredients and mix for just 30 seconds until incorporated and you no longer see streaks of flour. There may be some small lumps still, and that’s ok. It’s better than over mixing which is a common mistake with cupcakes. This causes the batter to be over worked which makes the cupcake less tender.
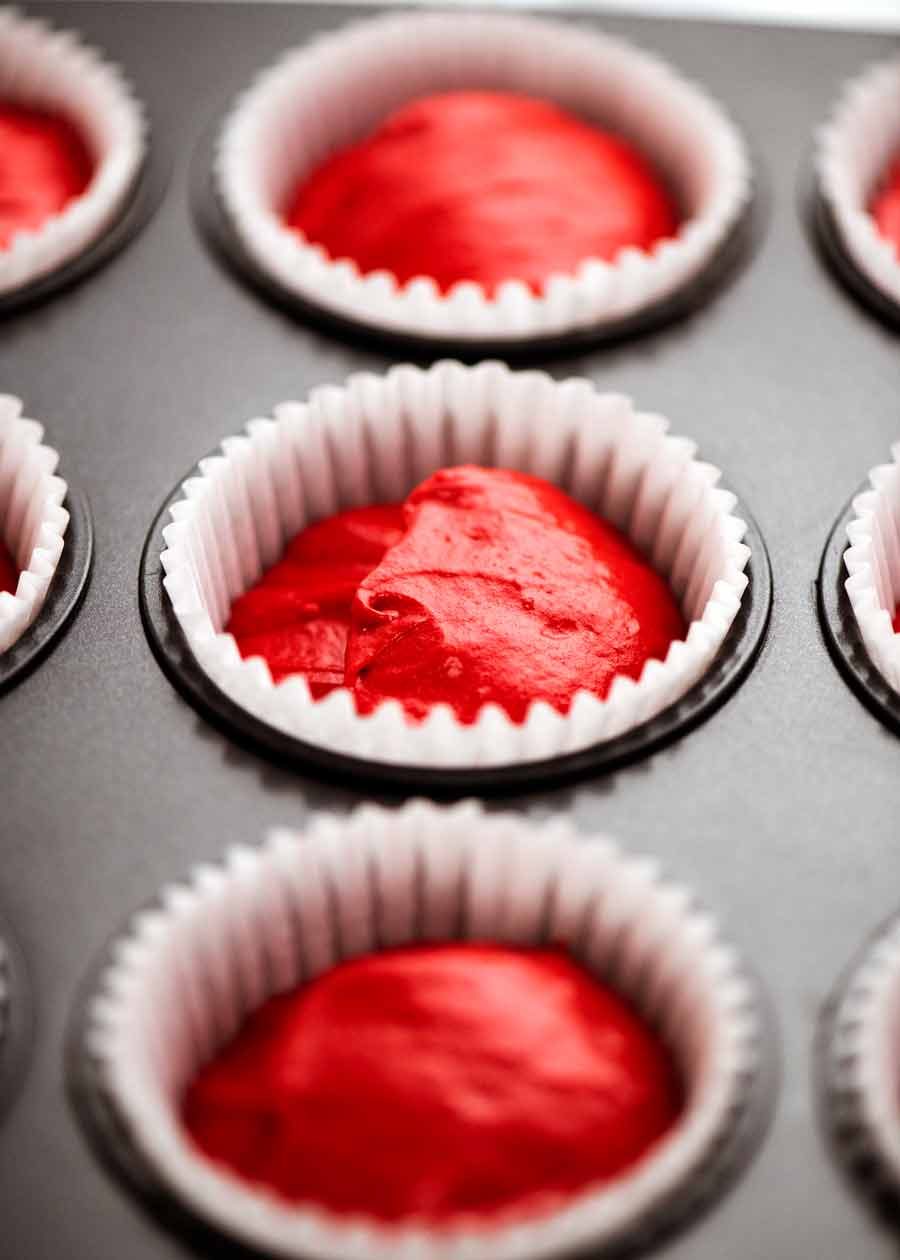
Important – Once the dry ingredients are mixed with the wet ingredients, do not stop. Fill the muffin tin and get it in the oven quick smart. The reason is because once the wet ingredients are combined with the dry, the baking powder is activated. If you leave it sitting around, the baking powder will be bubbling away in the raw batter and by the time it’s baked, it won’t rise as well. This rule applies to all baking recipes!
Fill muffin tin with the batter. It makes 12 perfect cupcakes, so divide all the batter between the 12 holes. If you use a standard muffin tin with cupcake liners the size I use, then it should fill the paper liners 3/4 of the way up to produce perfectly domed cupcakes!
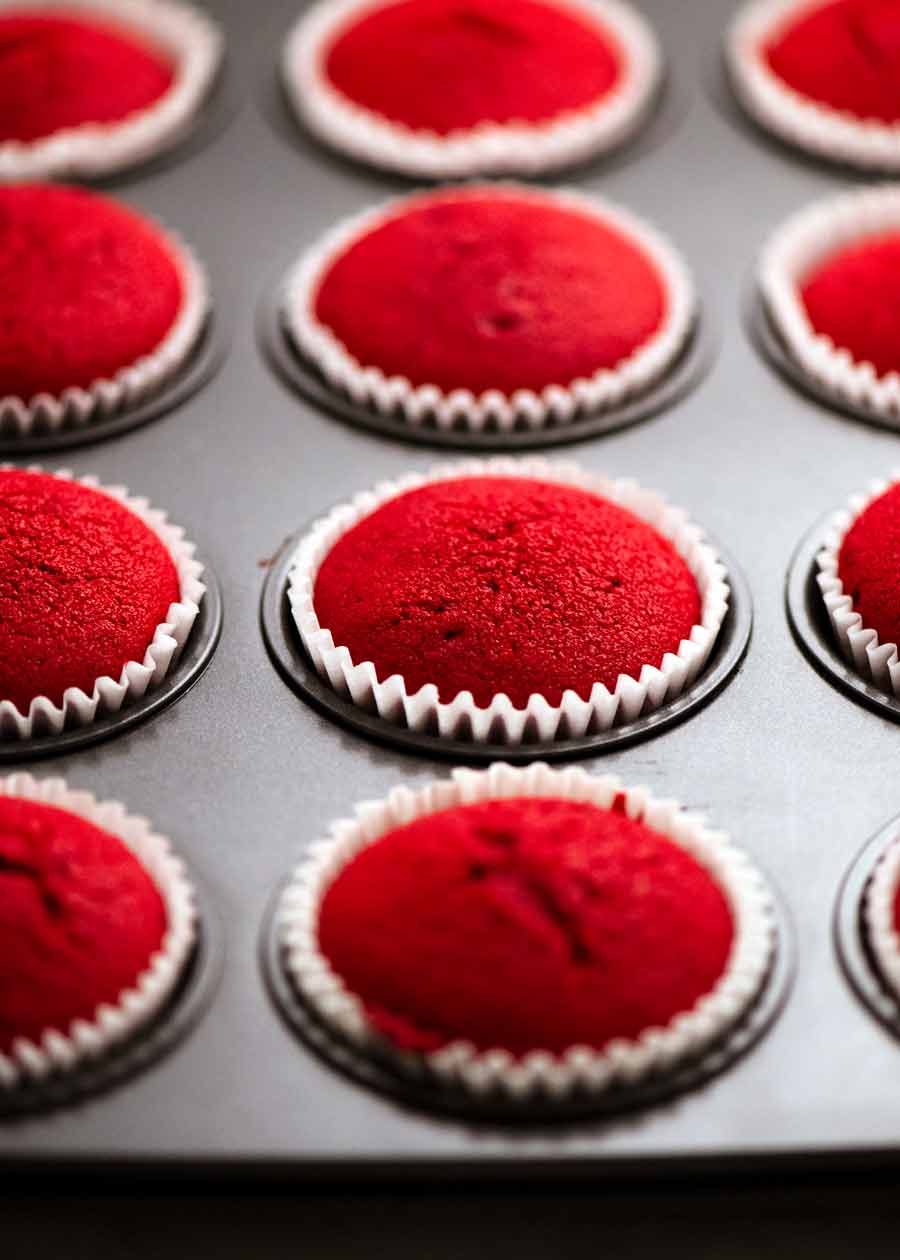
Bake for just 20 minutes in a 180°C/350°F (160°C fan) oven, or until a toothpick inserted in the middle cupcake comes out clean.
The surface of some of the cupcakes will be a little cracked. But that is absolutely no issue. Because in what world do people send out unfrosted cupcakes?? 😂
Cool completely before frosting. Warm cupcakes with butter based frosting = disaster! (In the form of melted frosting!)
Ingredients for Cream Cheese Frosting for Red Velvet
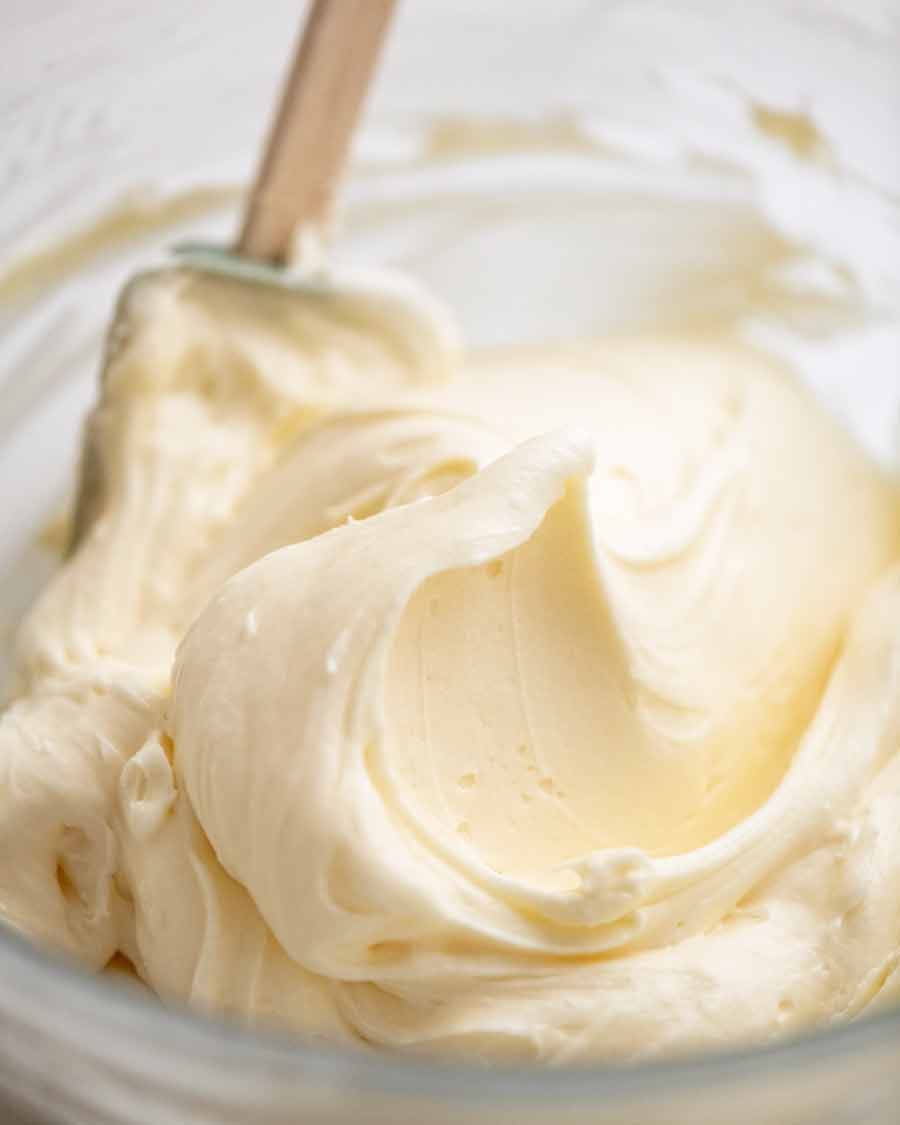
Cream Cheese is the most common frosting you see these days for Red Velvet Cake and Cupcakes, and that’s what I’m sharing today. The creamy, fluffy sweet frosting with the tang from cream cheese is a perfect match with the cupcakes!

Cream cheese – Must be block, not the tub cream cheese which is softer as it’s the spreadable kind. If you use tub, the frosting will be too soft and sloppy.
Philadelphia is still my brand of choice, though these days better value brands are actually pretty good (I wouldn’t have said that 5 years ago!). Make sure it’s softened so it can be whipped to make it fluffy and creamy. If you’re in Australia, Philadelphia cream cheese these days is soft enough straight out of the fridge to whip. If you’re in the US, leave it on the counter for a bit.
Soft icing sugar / powdered sugar – Not to be confused with pure icing sugar which sets hard for things like royal icing, soft icing sugar / powdered sugar is a mix of cane sugar and tapioca or maize starch so it dissolves easily into frosting intended to be soft, fluffy and creamy.
Butter – To add richness to the frosting as well as giving it structure so it can be piped.
Vanilla – For flavour.
Salt – Just a pinch brings out flavour in baked goods!
How to make Cream Cheese Frosting
The trick to making a lovely fluffy, creamy cream cheese frosting is to beat, beat, beat. Oh – and to beat the butter first before adding the cream cheese, and to add the icing sugar in parts so you don’t get a dust storm in your face!
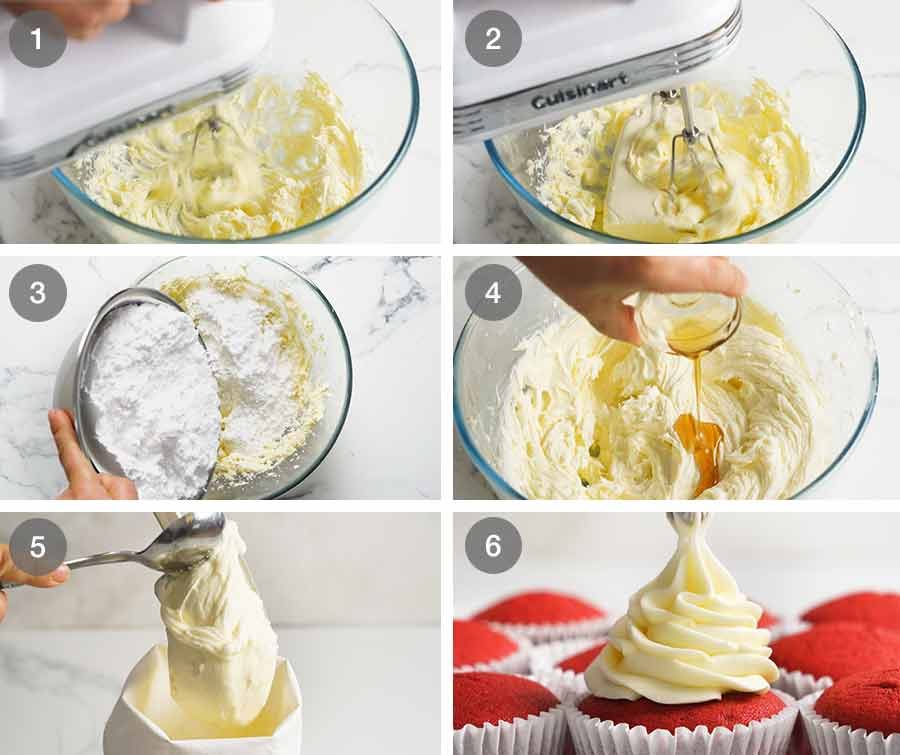
Cream butter: Beat the butter first for 1 minute until it’s smooth and starts to become paler in colour – speed 6 on stand mixer using the paddle attachment, or speed 9 for electric beater. I do this because the butter needs to be creamed longer than cream cheese. It also helps to make the frosting more white – butter changes from yellow to almost white the longer you beat it.
Cream cream cheese: Add cream cheese then beat for a further 1 minute on the same speed until smooth.
Add icing sugar: Add icing sugar in 4 batches, beating in between until incorporated, starting on speed 1 so you don’t get a dust storm in your face! If you do have dust storm problems, just place a clean tea towel over the bowl as you beat.
Beat until fluffy: Add vanilla and salt, then beat for 2 minutes until fluffy – speed 6 with stand mixer, speed 9 with electric beater. It should be creamy but still hold its shape in a peak (see video). If it’s too sloppy, place in fridge for 30 minutes, then beat again.
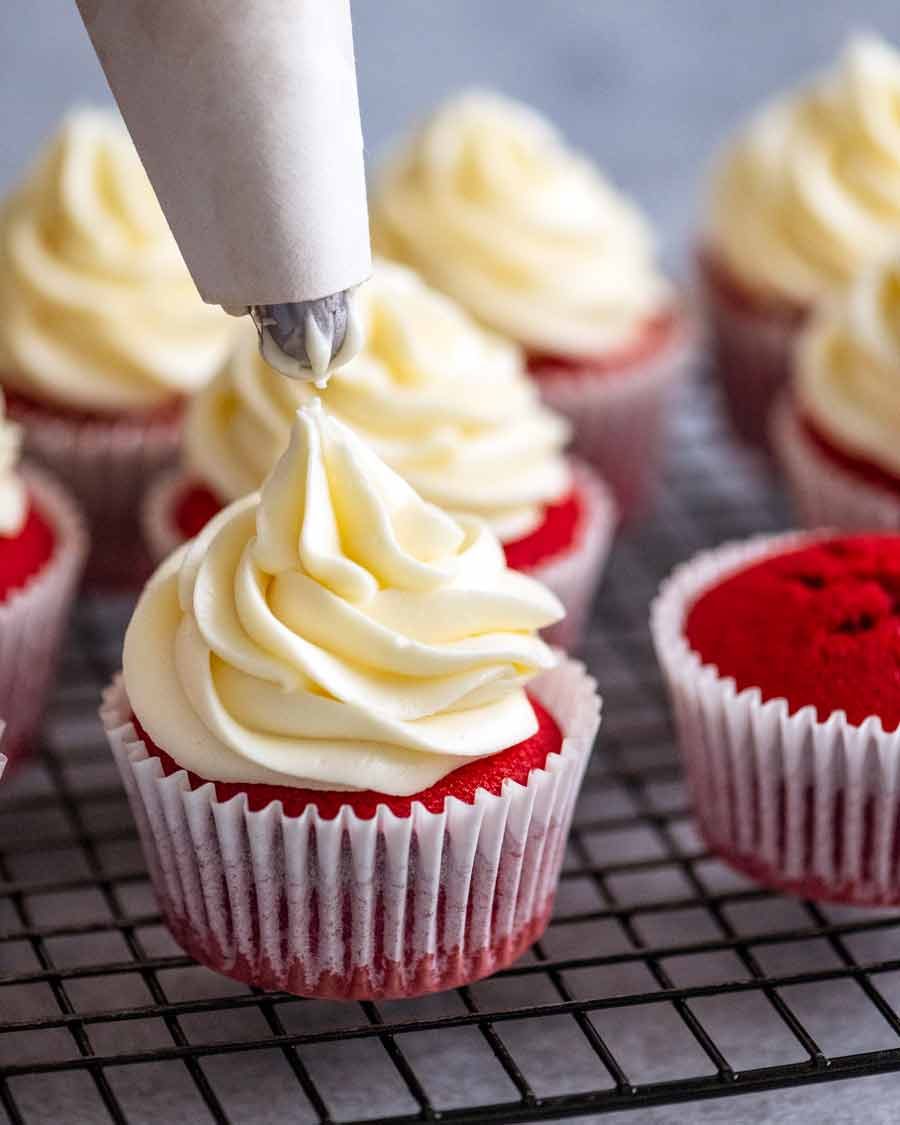
Piping bag: Transfer into piping bag with desired piping tip.
Pipe onto cupcake, swirling it up nice and high! This recipe makes enough to generously frost 12 cupcakes as pictured in post.
Fresh for 3 days – more tender than most!
You’ll find these Red Velvet Cupcakes are more moist and tender than the typical recipe, owing to the use of the combination of both butter and oil (as opposed to just butter) and the rather strict beating times I provide. Over beating is one of the most common causes of tough cupcakes with “rough” crumbs. Stick to the times I provide, and I guarantee you will have the most plush Red Velvet Cupcakes on the block!
The other benefit of extra soft Red Velvet Cupcakes is shelf life. Cupcakes are notorious for becoming quite dry the next day. But not these! The shelf life of these is 3 days in an airtight container. Keep them in the fridge if it’s warm where you are. The frosting will become firm, so be sure to bring to room temperature before eating so the frosting becomes nice and creamy again! – Nagi x
Watch how to make it
Hungry for more? Subscribe to my newsletter and follow along on Facebook, Pinterest and Instagram for all of the latest updates.
Red Velvet Cupcakes with Cream Cheese Frosting
Ingredients
Dry Ingredients:
- 1 1/3 cups cake flour (sub plain / all purpose flour, Note 1)
- 1 tbsp cocoa powder , unsweetened (Note 2)
- 1 1/2 tsp baking powder (not baking soda, Note 3)
- Pinch of salt
Wet Ingredients:
- 60g / 4 tbsp unsalted butter , softened (Note 4)
- 2/3 cup caster sugar (superfine sugar)
- 2 large eggs , at room temperature (Note 5)
- 1/3 cup vegetable oil (or canola)
- 1/2 cup buttermilk , at room temperature (Note 6)
- 1 tsp vanilla extract
- 1/2 tsp white vinegar (Note 7)
- 1 tbsp red food colouring (yes, 1 whole tablespoon!)
Cream Cheese Frosting:
- 1/3 cup unsalted butter , softened (Note 4)
- 170g / 6oz Philadelphia block cream cheese , softened (Note 8)
- 1/2 tsp vanilla extract
- 1/8 tsp salt
- 2 1/2 cups soft icing sugar mixture (powdered sugar) , sifted (Note 9)
Instructions
Cupcakes:
- Preheat oven to 180°C/350°F (160°C fan). Line a standard 12 hole muffin tin with cupcake liners.
- Sift Dry ingredients together into a bowl.
- Cream butter: Put the butter in a separate bowl and beat on speed 2 for 1 minute with an electric mixer or stand mixer (paddle attachment).
- Cream sugar: Add sugar then beat for a further 2 minutes, same speed, until the butter is very pale yellow, almost white.
- Beat in eggs: Add the eggs one at a time beating for 30 seconds on speed 1 after each addition.
- Add remaining Wet ingredients: Add oil, buttermilk, vanilla and red food colouring then beat on Speed 1 until incorporated and the batter is smooth.
- Beat in flour: Sprinkle the Dry ingredients across the surface and mix on Speed 1 for just 20 seconds. Scrape down sides of the bowl, then mix again for 10 seconds. The batter should now be smooth – few small lumps is ok. Do not keep beating – overworks batter = cupcakes not as soft!
- Fill pan: Divide the batter between the 12 cupcake liners – it should fill 3/4 of the way, but it depends on the size of the cupcake liners you use.
- Bake for 20 minutes or until a skewer inserted into the centre of the middle cupcake comes out clean.
- Cool: Immediately remove cupcakes onto a wire rack. Cool completely before frosting with cream cheese frosting.
Frosting:
- Cream butter: Place butter in a bowl and beat for 1 minute until it's smooth and starts to become paler in colour – speed 6 on stand mixer, speed 9 for electric beater.
- Cream cream cheese: Add cream cheese then beat for a further 1 minute on the same speed until smooth.
- Add icing sugar: Add icing sugar in 4 batches, beating in between until incorporated, starting on speed 1 so you don't get a dust storm in your face!
- Beat until fluffy: Add vanilla and salt, then beat for 2 minutes until fluffy – speed 6 with stand mixer, speed 9 with electric beater. It should be creamy but still hold its shape in a peak (see video). If it's too sloppy, place in fridge for 30 minutes, then beat again.
- Pipe: Transfer into piping bag with desired piping tip. Pipe onto cupcakes – makes enough to generously frost 12 cupcakes as pictured in post.
Recipe Notes:
Nutrition Information:
Life of Dozer
He’s such a good shoot assistant….

Hello,
I love your recipes, but I have a child with egg allergies. Have you tried an egg alternative that works for this recipe?? Would it work if I omit the eggs?
Maybe you could try some all time favourite’s and convert them to an egg-free recipe if you are bored in lockdown 😉
I’m not Nagi but I hope I can help…
In cupcakes you can usually sub eggs one by one for a gel made of ground flax, or ground chia seeds, or whole psyllium husks. You can look on the net for the doses. These will offer binding power but not leavening; psyllium husk is basically flavorless, chia seeds most people (95%) won’t notice, and flax has a bit of its own flax flavor, which I wouldn’t want in this recipe but works great with whole grains type sweets.
For leavening, a trick often used in eggless cakes is a mix of bicarb + an acid like a small bit of vinegar or lemon juice. If you do it correctly you won’t taste the vinegar at all, but I don’t know how much vinegar and soda to add in this recipe, I’d have to experiment…
Another way to add fluffiness would be to add whipped aquafaba (chickpea cooking liquid) at the last step, just like you would add whipped egg whites. Cream of tartar is usually added to the whipped aquafaba to stabilize it. It won’t taste of beans but aquafaba is usually pretty salty…
Personally I’d try a small batch with the gel option and maybe add a little bit of baking soda, the buttermilk already in the recipe should react to it.
Best wishes
Thanks for replying. I have tried many different things, so was wondering what Nagi has found to work best.
Hi Emma, sorry I haven’t tried this with an gg substitute sorry – would love to know if you give it a go though!! N x
Thank you for responding. I’ll keep persevering on, I just find most subs aren’t the same and wondering if you had had any success with anything in particular.
Red Mill has an egg substitute for baking. You should try it out.
Thank you. Can you get it from Woolworths?
Nagi, I made the red velvet cupcakes last night and they didn’t turn out that beautiful red that yours are. I used a tbles of cochineal and they turned out a dirty brown red? Why do you think that is?
Hi Dawn, that would be due to the food colouring you’ve used. I use a liquid artificial colouring, you’ll find that natural substitutes aren’t as vivid unfortunately. N x
I have just bought some beetroot powder but haven’t used it yet. What quantity would I need as a substitute for red food colouring? So glad I’ve found your blog. I’ve been tempting my 91 ye old mother’s jaded palette with some incredibly tasty meals. Thank you so much
Hi Lynda, I haven’t tried this just yet – I would start with 1 tbsp and up the colour if you find it isn’t as vivid as in the video. N x
Hidey Ho there
I can’t find how much vinegar please?
(Sorry if I’m blind)
Cheers
Ahhh. There it is! (Ignore- I refreshed the page!)
🙏🏻
The only thing I need to grab is some buttermilk. I mean I could ‘make’ some, but would prefer the real thing. I am making these this weekend! Your recipes never disappoint.
~~Thank you Nagi~~
Enjoy Tina, Come back and let me know what you think!!! N x
I love you Nagi and I even opened the garden salad recipe to support you, but you definitely cheated lol
Wahoo, thanks Romi!!! 😉 N x
Hahaha I love you no matter what!🤣 Your site has been my to-go page for recipes for years now since the day I found your chili con carne❤️
Hahaha I love you no matter what!🤣 Your page has been my to-go website for recipes for years now since the day I found your chil con carne.❤️
Trying these today! Thanks, Nagi!
Enjoy Chris!! N x
I love red velvet and make a red velvet cake every Christmas. The traditional icing for red velvet is cooked buttercream. You should try it sometime… it’s sublime! Thanks for all you do!!
Hi Kathryn, yes it’s called Ermine frosting you can definitely use it here instead, you’ll find my recipe here: https://promotown.info/fluffy-vanilla-frosting/%3C/a%3E N x
~10g of sugar per cupcake is… a mite much for me.
Is it possible to substitute with fake sugar (like stevia for eg)? If so, what do you think would work best?
Hi Andrew, well we are eating cake after all! You cannot sub artificial sugar here for this recipe as written sorry, it will change the flavour and texture. N x
We are we are and, well, I can dream, can’t I? 🙂
Thanks for the reply. 🙂
Hello
Always enjoy your recipes and videos. Question for velvet cupcakes video shows you added vinegar to the mix but you don’t mention vinegar in list of ingredients. Please advise. Thanks
Hi Annette – it’s been updated sorry! N x
Hi Nagi
I so want to make these cupcakes but I’m in the UK and I’ve never seen Philadelphia in a block only in tubs🙁 any suggestion please
Hi Carole,
I live in Portugal and have the same problem. My cream cheese icing always comes out sloppy because cream cheese in a tub is all I can get.
I’m wondering if draining the cream cheese overnight might thicken it up enough to make nice cream cheese icing????
Hi Carole, if you can’t find it why not try my ermine frosting instead: https://promotown.info/fluffy-vanilla-frosting/%3C/a%3E N x
Happy you (we) won Salad competition 💚
Thanks Maddy 🙂 N x
Hi Nagi have you ever tried milk kefir instead of butter milk? I culture my own milk kefir which I love for a drink (maple syrup & cinnamon are delicious) & over muesli & fruit in the mornings but I’ve never tried it in baking.
I always use storebought kefir made from partially skimmed milk in place of buttermilk for baking and I think it’s the best sub. I can’t find buttermilk in Italy.
If yours is homemade it might have a stronger fermented flavor, if you don’t want that maybe dilute it with a bit of milk curdled with lemon juice. But I wouldn’t bother.
I haven’t Pauline! Great idea though – something for me to try! N x
Oh my lord, Nagi – this is food porn! DROOL!! I can not wait to make these tomorrow! Thank you!!
I hope you love them Cat!! N x
This is my friend whose a nurse at SVH in Darlinghursts favourite. She’s working 12 hour shifts in full PPE, the Covid-19 wards are now full and she lives alone. I wish I could make a batch and send it to her but I’m in Melbourne. Is there a way to post cupcakes??? Could I freeze them then overnight them?
She’s one great person for being on the frontline Rachel!!! N x
Hi Nagi,
I love the look of this recipe and can’t wait to make it! 💖
I was just wondering if there is anyway I can use beetroot to colour the cupcakes and how to achieve this?
Thank you so much and LOVE this blog! 🤩
Beets were used in the original red velvet recipe. Look up Waldorf original red velvet cake recipe.
Thank you for the information! 😀
I have a recipe that is almost identical to Nagi’s, except that it uses cooked beetroot.
I scrub & wrap 3 large beetroot in foil & bake in a 180* oven for approx 70 minutes. Allow to cool & remove skins. Chop beets in a food processor till about the consistency of finely diced onion. Measure out one cup & set the rest aside. Add cupful to FP & blitz again while adding buttermilk, lemon juice from one lemon, vanilla & vinegar. Puree.
After you have creamed the butter & sugar & added the eggs, take it in turns to add a portion of the beet mix followed by a portion of the flour mix. Remember Nagi’s instruction to only beat at this stage for no more than 30 seconds. I have grand kids that cannot have food colouring but they love red velvet cupcakes. Hope tis helps.
Thank you for the concise instructions Bonnie! I can’t wait to make the cupcakes with the beetroot! Thank you so much! 🤩
Man. Wish replies that suggest modifications to a recipe could be pinned to it.
This looks nifty. Is the resulting colour a deep beetroot kind of red?
Hi Andrew, no the colour is not as bright as the food colouring, its more a burgundy colour.
Hi Kenna, you can or you can even use beetroot powder to colour the cupcakes! N x
Thanks Nagi, love your work! x
Red Velvet Cake is my youngest sons favorite. I never really thought of doing cupcakes, but yum! My recipe only has butter and you are right it isn’t as moist the next day no matter what you do. Thank heavens it goes pretty fast so I don’t worry. Will try these this coming weekend when I have people to eat them up, especially the younger son! What a treat he will have. Thank you again for the best of a Red Velvet. Dozer you are the perfect gentleman sitting there with those burgers. My Roxie or Sara would no doubt have messed up that shoot with just the drool!
I’d love to know what you think and how they compare to your recipe Mary!! N x
Congratulations on the salad win…Winners are Grinners 😜. Looking forward to making the Red Velvet Cupcakes 😍.
Thanks so much Ruth!! N x
Hello,
I love your recipes, but I have a child with egg allergies. Have you tried an egg alternative that works for this recipe?? Would it work if I omit the eggs?
Maybe you could try some all time favourite’s and convert them to an egg-free recipe if you are bored in lockdown 😉
Ditto Macy – I’m surprised they weren’t all gone in seconds. Good Dozer! I’d have snuck him a bit. The cupcakes look delicous too (but always have to check on Dozer first). 😉
Don’t worry – he always gets some at the end 😉 N x
Dozer is SO cute with his new pal. I hope they get to stay friends!
That RED is just so electric…they just gotta be bad for you! I’m not sayin’, I’m just sayin’.!
You can always use beetroot powder in its place if you don’t want to use the food colouring Vivian – N x
Thanks for the heads-up, Nagi. I wouldn’t have thought of that. The colour will be a touch more subdued I imagine…maybe a darkish pink?