
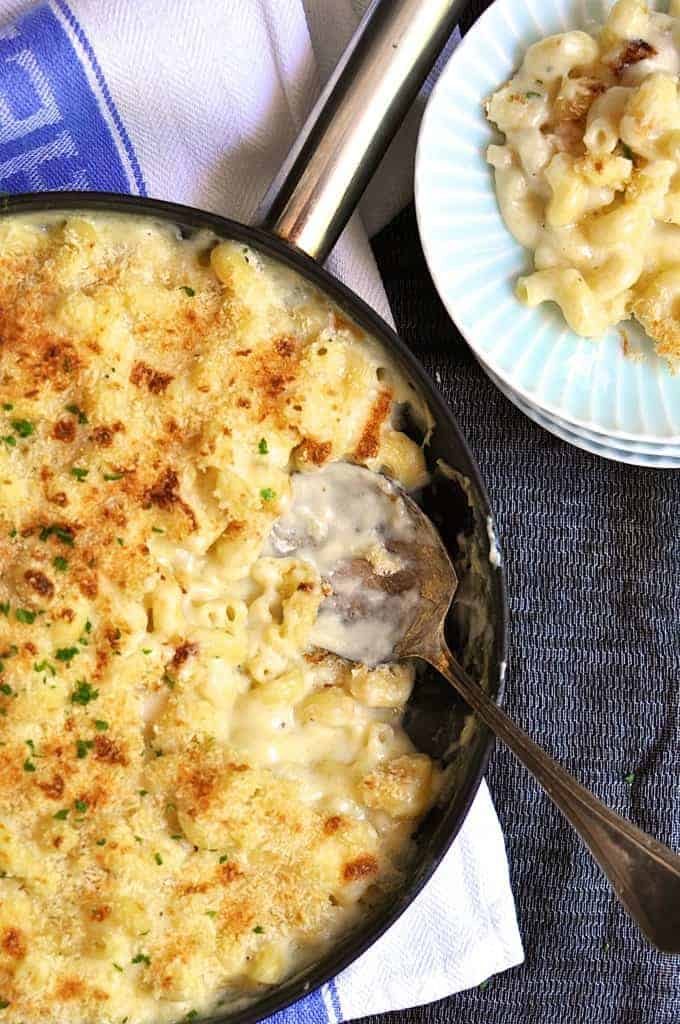
Baked One Pot Mac and Cheese – yep, all made in the one pot (no separate pot for pasta cooking)! If you hate washing up and like your Mac and Cheese with plenty of cheesy, creamy sauce then this is the recipe for you. Oh, did I mention there’s not a drop of cream in this??!!
“A great Mac and Cheese comes down to personal taste. I like mine extra saucy, creamy and cheesy. And it just so happens that it’s made one pot – WITHOUT cream!”
There are so many Mac and Cheese recipes “out there” that it’s mind boggling. I have made it various ways. I particularly like to try “chef” versions.
When I came to choose one that I wanted to share with you, I didn’t know which to go with. I don’t think there is such thing as the “perfect” or “best” Mac and Cheese. Restaurants around the world have put their own spin on it, with everything from making it with truffles, six types of cheese and goats milk, to name a few.
A great Mac and Cheese comes down to personal taste. For me, extra saucy and creamy is what does it for me. Cheesy goes without saying. 🙂
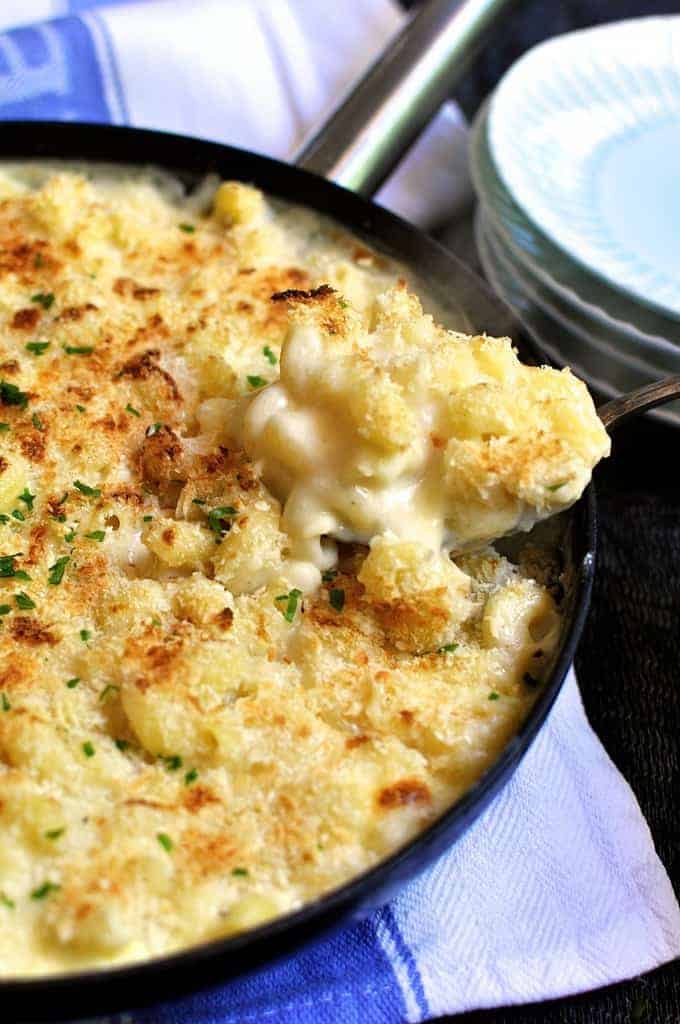
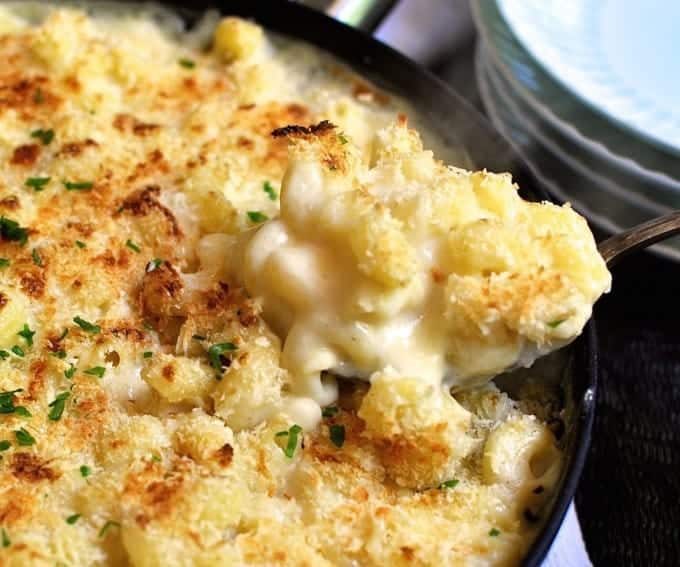
Don’t you just want to do a face plant in this? Look how creamy and sauce it looks!
To make a Mac and Cheese as saucy as this with cream would require several cartons of cream. My arteries clog up just at the thought. 🙂 Happy thoughts, but realistically, it would be so insanely rich that you wouldn’t be able to eat very much of it!
So instead, I make my creamy sauce using a simple roux of butter and flour. Don’t let that fancy word “roux” deter you, it is really simple and takes minutes to make.
The trick to making this in one pot is making the cooking liquid thin enough for the pasta to absorb and rehydrate WITHOUT going mushy but reduces down enough in the time it takes for the pasta to cook so you end up with the perfect amount of rich, creamy sauce. And that sauce needs to have the right seasoning and flavour which is always tricky when making sauces that reduce alot as it is hard to guess how intense the flavour will be once reduced.
One thing about any creamy pastas is that you really need to eat it straight away. Even after 30 minutes, the sauce continues to get absorbed into the pasta and thickens quite a bit so you lose the sauciness. Plus the pasta gets soft. So when it’s ready, holler for your family to get to the dinner table so they can have their grub while it’s fresh out of the oven when it’s at its absolute peak. 🙂
Anyway, I’d be disappointed if you have any leftover. Whether you’re making this for 2 or 6!
– Nagi
THE MAC & CHEESE COLLECTION
- Baked Mac and Cheese – huge reader favourite!
-
Shrimp Mac and Cheese – outrageously delicious!
-
Stovetop Mac and Cheese – one pot, 20 minutes
Hungry for more? Subscribe to my newsletter and follow along on Facebook, Pinterest and Instagram for all of the latest updates.

Baked One Pot Mac and Cheese
Ingredients
- 4 tbsp unsalted butter
- 6 tbsp flour
- 3 cups of milk (full or low fat - I used low fat)
- 2 cups of water
- 1 tsp salt (Note 1)
- Black pepper
- 1/2 lb / 250g dried macaroni (elbow pasta) (Note 2)
- 2 cups (150g / 5oz) grated tasty or cheddar cheese (or any sharp, flavoured cheese that melts well)
- 1 cup (75g / 2.5 oz) grated provolone dolce cheese (or mozzarella or other mild flavoured good melting cheese) (Note 3)
Topping
- 1/4 cup panko breadcrumbs (or ordinary breadcrumbs)
- 1/4 cup parmesan cheese , grated
- 1/2 tbsp fresh parsley , finely chopped (optional)
Instructions
- Preheat the oven to 180C/350F.
- Melt the butter in a deep fry pan or skillet (Note 4) over medium heat. (Note 5)
- Add the flour and stir until combined so a thick paste forms ("roux"). Cook, stirring constantly, for 1 minute.
- Add half the milk and use a whisk to dissolve the roux into the milk. It will thicken quickly, then add the remaining milk. Whisk in small circles, rotating around the pan, to dissolve all the roux into the milk.
- Add the water, salt and 5 grinds of pepper, then turn the heat up to medium high. Whisk leisurely so the bottom doesn't stick to the pan. When the white sauce starts to steam and thickens such that you can see it coating the edges of the pan (around 2 to 3 minutes), add the macaroni.
- Turn the heat down to medium and stir gently with a wooden spoon to mix the macaroni through and ensure the bottom doesn't stick. Cook it for 1 minute. Be sure not to cook it for longer than this after adding the macaroni - this really impacts the "sauciness" of the dish and ensuring the macaroni isn't overcooked.
- Cover the fry pan (Note 6), then transfer it immediately to the oven on the middle shelf.
- Bake for 12 minutes, then remove from the oven. It will seem like there is too much sauce but it reduces and thickens in the next steps. The pasta should be just cooked (al dente). It will continue cooking from the residual heat.
- Turn the oven off and turn the grill/broiler on high.
- Stir through the cheese, just enough to disperse it through the macaroni. As you stir, this will melt the cheese and thicken the sauce. Don't stir too much because otherwise the sauce will thicken too much due to the evaporation.
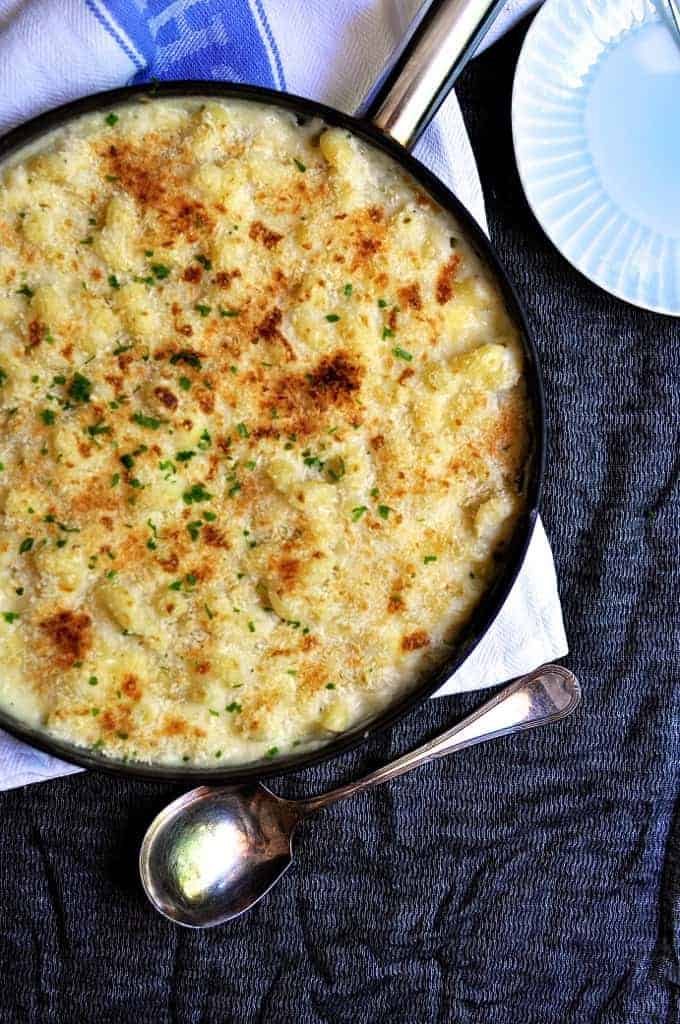
- Sprinkle over the panko and parmesan cheese, then place under the grill/broiler for a few minutes to brown.
- Remove from the grill/broiler and let it rest for 5 minutes before serving.
Recipe Notes:
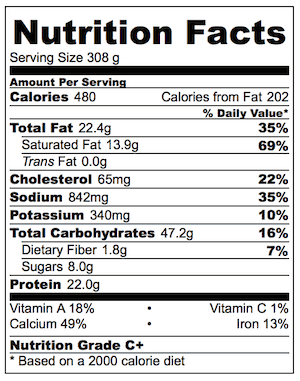
Nutrition Information:
Notes for Food Nerds (like myself!) – Why this recipe works without ending up with mushy pasta and curdled sauce:
* Pasta takes a LONG time to cook in a thick sauce and turns very mushy. Thinning the sauce alot at the beginning allows the pasta to cook in almost the same time as it would in boiling water.
* The key to this recipe is getting the amount of liquid right so that the sauce is initially thin enough for the pasta to cook but then by the end of the cooking time for the pasta, the sauce reduces down to be a thick, creamy sauce. That’s why you can’t simply sub the macaroni with any other pasta you want without adjusting the quantity of liquid required – because different pastas cook in different times.
* The cheese is stirred through at the end because if it is added before the pasta it cooked, it thickens the sauce and it takes much longer for the pasta to cook. Plus the sauce has a tendency to curdle so you need to stir it a few times.
* When you stir the cheese through at the end, the residual heat melts it very quickly. Also, as you stir it, the sauce thickens even more.
* The panko topping is added at the very end because otherwise it will sink in the liquid.
SaveSave
I have never made a mac and cheese recipe before but want to try this one. Yours has gotten the best reviews – however, I am making it for 15 people. Would you just triple the original recipe?
I have not had much success with homemade mac and cheese until now. Thank you so much for this amazing recipe! My kids were thrilled (and so was I!). They request it all the time.
Oh. My. Goodness. This Mac n cheese was so delicious!! My mom requested lobster Mac n cheese for mother’s day so I followed this recipe and threw in some chunks of lobster. I would say the lobster was hardly even necessary! Even the bites without it were to die for! I’m usually picky about my Mac n cheese because some recipes are so greasy but this one was perfect and creamy without the cheese giving off that oiliness. I used cheddar with Gouda and will definitely be making this again and again and again!
I made this recipe for the first time and I only had sharp cheddar and Parmesan so I decided this time to do 3 cups of sargento sharp cheddar and toped it with sartori Parmesan. Even with that change, the recipe turned out beautifully. Hands down this is the BEST mac’n’cheese recipe.
Thank you so much!!
That’s so great to hear Andrea! So glad you enjoyed it! N x ❤️
This is my first time visiting this site for a recipe, and I’m delighted! My mac and cheese turned out wonderfully. It was such a decadent meal, and it was a breeze despite cooking it for the first time. (The notes were really helpful too). I’ll definitely make it again, and can’t wait to try some of your other recipes. Thanks Nagi! -a new fan
I’m planning on making this dish tonight and adding broccoli like some others have done! Quick question before I do, when I add the broccoli before it goes in the oven, should it be cooked already or raw? Thanks in advance!
Hi Morgan! Broccoli won’t take long to cook, you can just stir it in halfway through 🙂
The best comfort food ever! I too have tried a ton of mac and cheese recipes and they have never been good. This is simply amazing! Follow all the instructions though. Mine came out perfect. Thank you Nagi for another great recipe! 👍
Thank you SOOOO much for this recipe!! I have made quite a few homemade versions, and my search is finally over! I use my biggest cast iron skillet, make sure to have everything prepped before I start (key to success with this recipe because it is fairly involved), and pull out my stick blender/cup to use for the roux step (only way I could get it creamy and boy does that work flawless every time!! :)). Thank you again for sharing this with us! 🙂
Pleased to hear you enjoyed it Laura, thanks for letting me know! N xx
Love this recipe! I’ve added bacon, and a bit of spice/heat to it and it’s fantastic! Definitely thinking about broccoli and scallops now too after reading the other comments. Thanks for the recipe and the amazing notes. Very helpful.
I’m so pleased to hear you enjoyed this Shaida! Thank you for letting me know! N xx
You add dry pasta to the milk mix? If so it needs to state that.
Hi Kris! it’s in the directions 🙂
I made this for my family tonight, and they all loved it! My dad claimed that it was the best mac and cheese that he had ever eaten. Thank you very much!
Thanks Eric! So glad to hear you and your Dad enjoyed it! N xx
Hi, I love this recipe, I was wondering if there is a way to get the roux to dissolve faster
Hi Allison! Unfortunately I don’t know of a faster way, it should not take long though, less than 30 seconds?
Wow this was the best homemade Mac and cheese! My husband and I couldn’t stop eating. Initially he was skeptical about the pasta going in dry but wow seriously came out perfect. Thank you for sharing this recipe. It’s a keeper.
I’m so pleased you enjoyed it Arpi, thank you for letting me know! N xx
Not a great Mac and cheese recipe.
I’m sorry you didn’t enjoy it Laura 🙁
OMG I usually do not make recipes from online but this one looked too good…and tasted even better! I used a little less water than called for because I didn’t have enough room left in my pan, but it still came out perfect! I plan on making this again soon! If you want to really get that golden brown top, I suggest putting the broiler on low instead of high.
I’m so glad you enjoyed it Marie, thank you for letting me know! N x
I’ve made this a few times now and my husband says its one of his favorite things make! We cook a good bit of tasty stuff, so it’s a real complement. To put this recipe over the top I add ham. I just take a ham steak, cube it, brown it, and then put it to side. I and the browned ham back when you mix in the cheese. It makes an already great recipe even better! It also makes it more of meal rather than a side.
I’m honoured Lauren! You sound like an amazing cook, and I LOVE the addition of browned ham! N x
My dad was a great cook and taught me to make a rue at a tender age. For everyone, especially beginners, since this recipe has water, instead of adding the milk first, add the water first and it is helpful if the water is warm/hot…. this willl help prevent lumps!
Thanks for the tip Esther!! I’ll give it a go myself, I’ve always added milk first!
Hi we are trying this tonight for dinner…..it look and smells delicious however we are finding it just a little salty other than that two thumbs up!!!!
Hi Bryan! Sorry to hear you are finding it too salty 🙁 I am actually a little on the conservative side with salt, I don’t like my food too salty like restaurant food!
Hi Nagi, I’m a big fan of your recipes! Everything I’ve tried so far works brilliantly. My whole family love it 🙂 I just have one question about this one (I’m about to try it but I got a bit stuck…). 250g of macaroni for some reason is not 3 cups for me – more like 3 half cups. In that case, should I go with 250g or 3 cups, given that the liquids are in cups (and 5 cups in total seems a lot). Many thanks!
Hi Jing! Thanks so much for your lovely message! That’s really different – 1 1/2 cups (being 3 x 1/2 cups) is 250g of macaroni???? I recommend going with 3 cups of macaroni because it will be in the right ratio to the liquid!
I had the same issue with the macaroni quantity – 250g was only around 2cups. But decided to stick to that quantity as I knew the pasta would expand a lot and hey…I love cheese sauce so I decided even if it was swimming in it I wouldn’t care! And Nagi once cooked it looked exactly like in your photos – not too much sauce at all – so probably weight measure is correct 🙂 Was completely DELISH by the way….so addicted to your recipes!!
Thanks for the question Su! I literally jumped up from the couch to check and realised that there are so many different size macaroni! I’ve updated the recipe to just make it by weight, not my cups. So glad you enjoyed it!!! N x
Hi Nagi! Made your “crack bread” yesterday and it was a hit! Was wondering if I can make the Mac n cheese with mild cheddar and Monterey Jack cheese? Can’t wait to make this for my kids!
Hi Nicole! Mild Cheddar and MJ is perfect 🙂 I doubt the taste will be any different at all! And I’m so glad you enjoyed my crack bread!!!
Hi Nagi! Just wanted to come to let you know that it came out really delicious!!! Only problem (my fault) I had was putting it too close to the broiler and so I burnt the top crunchy topping (had to scrape it off with tears rolling down my face!) looking forward to cooking up more of your fab recipes!
Oh bugger!!! 🙂 But I’m glad you still enjoyed it Nicole! Thanks so much for letting me know!!