
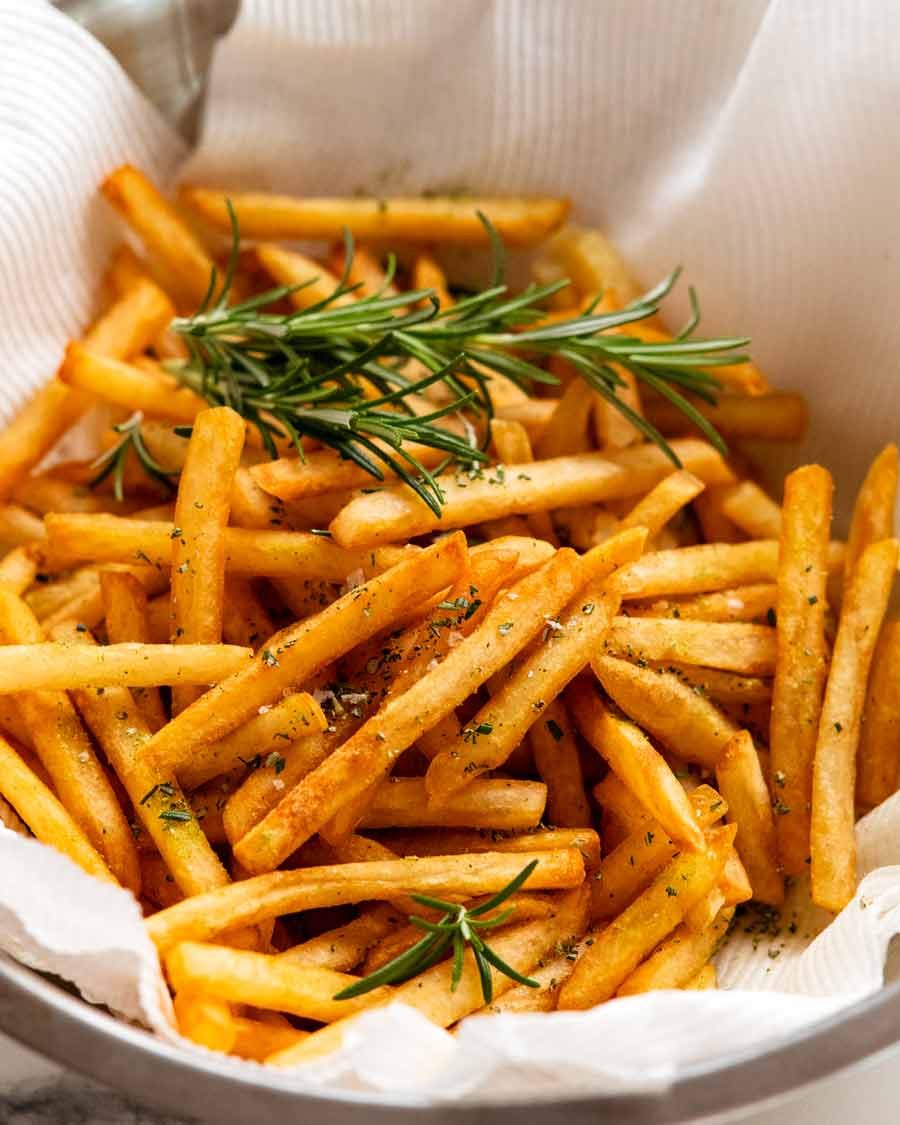
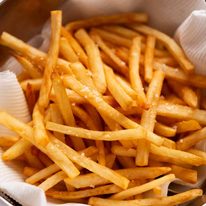
Finally, here it is – The perfect french fries recipe! Based on a ground-breaking method from the legendary Kenji López-Alt’s The Food Lab, these hot chips are so crispy they stay that way even after they’ve gone cold. It’s rare to find fries this good even at up-market bistros!
No false promises – these french fries really stay crisp!
There’s nothing more deflating than going to all the effort of making your own fries from scratch, only to find they start losing crispiness before they even hit the table. Which is what happens if you use the standard way of cooking homemade fries – soaking in water followed by a double fry.
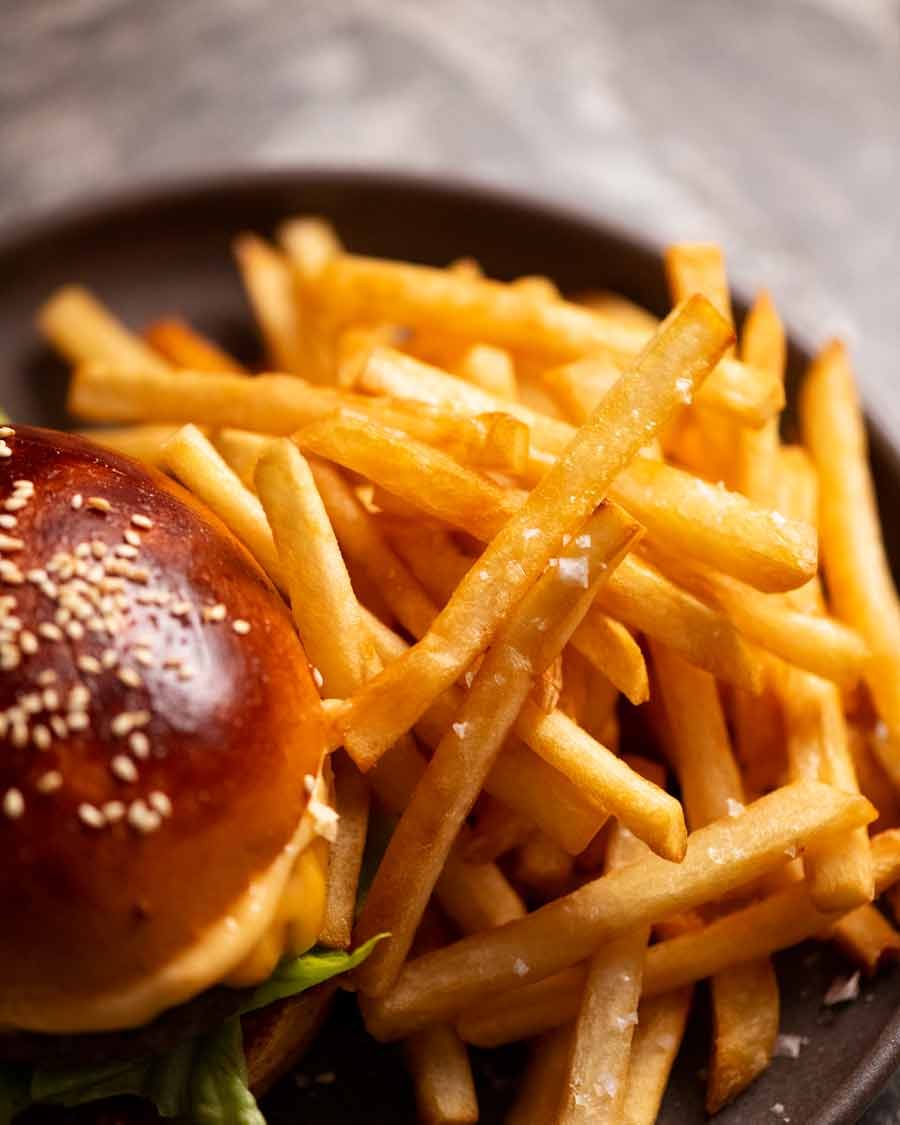
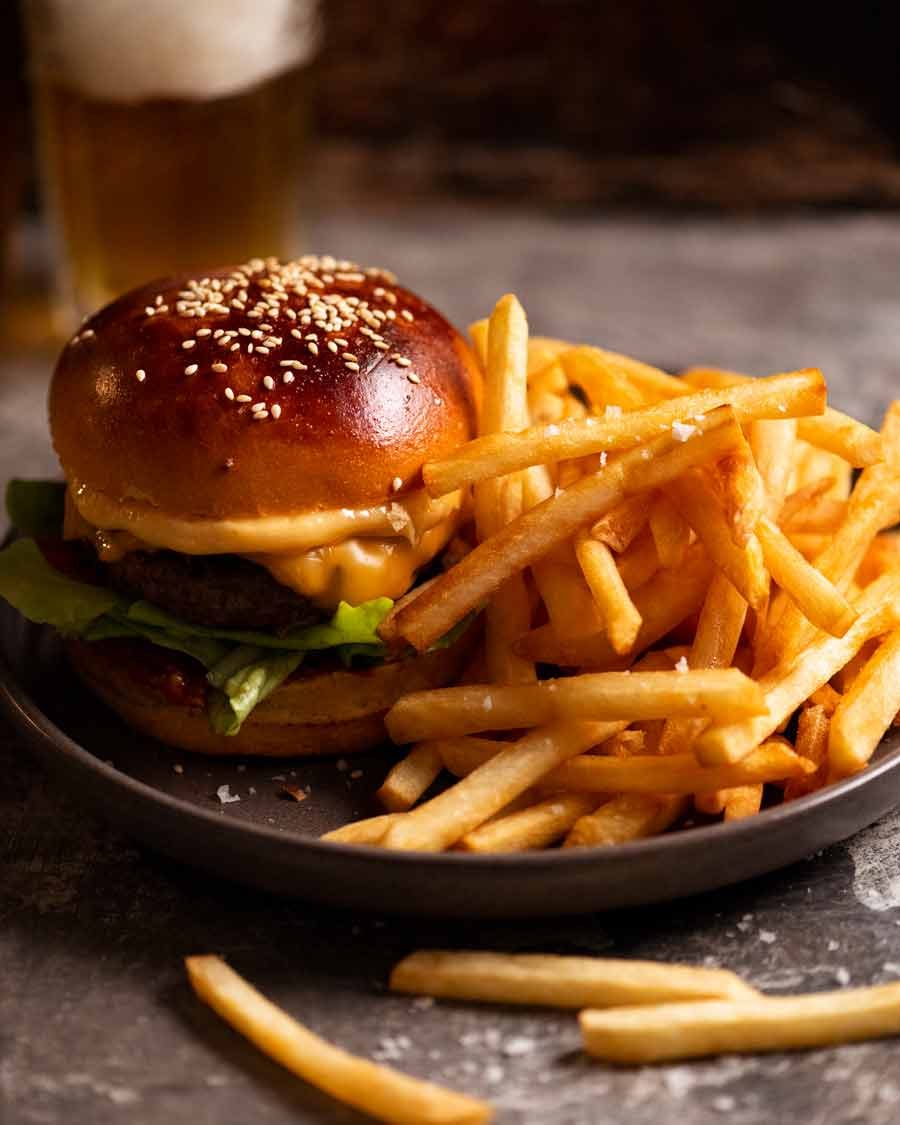
Well, it’s taken me years but with the help of the impressively thorough french fry research documented in Kenji López-Alt’s The Food Lab, Chef JB and I have finally nailed down the recipe for the perfect homemade french fries. Fluffy on the inside, crispy on the outside – and stays crispy well beyond the time it takes to eat the fries and, say, a big juicy Cheeseburger. The ideal french fry!
Really, the crispiness endurance is insane. These french fries are still crispy even after they’ve gone cold!
Heads up – this post is quite long because I cover the “why” and also want to arm French fry first-timers with the confidence to make this recipe. So if you’re a pro, skip to the recipe , recipe video or better yet, Dozer!

French fries recipe overview
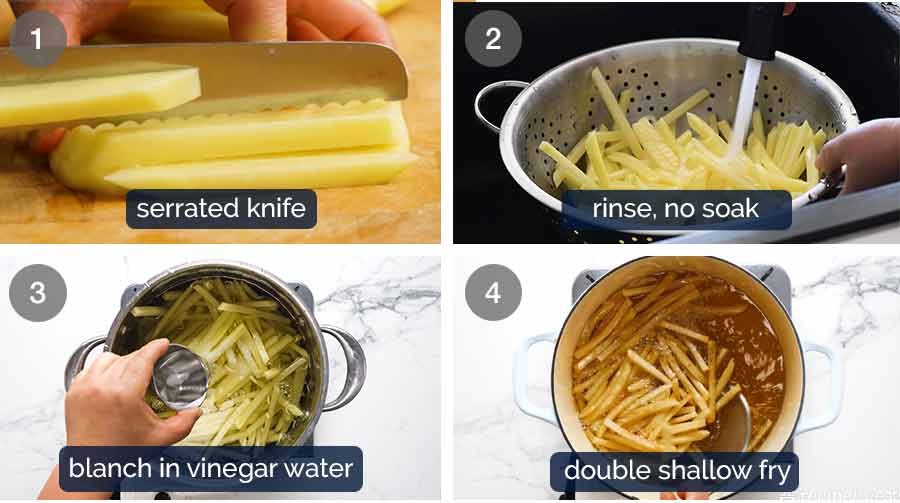
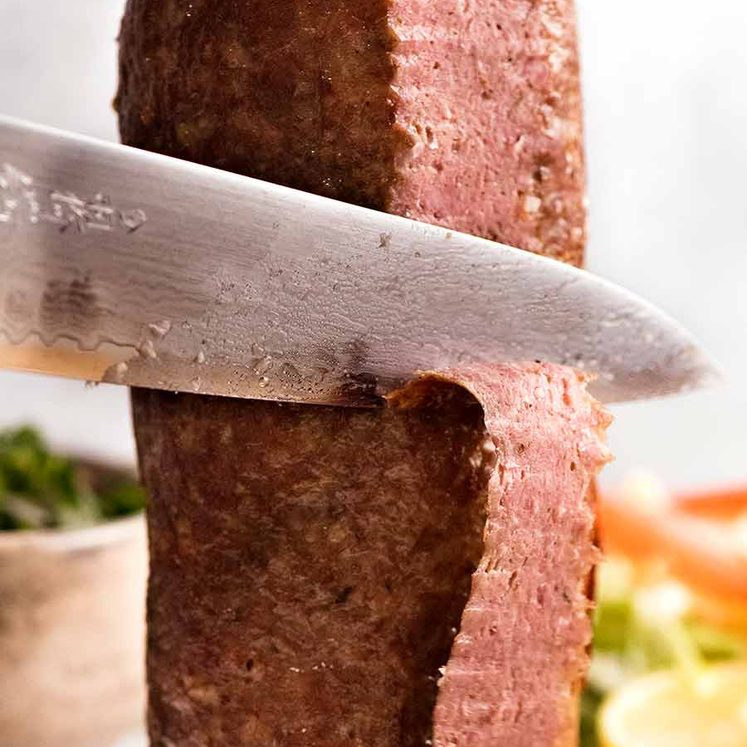
Cut fries with a serrated knife (secret crispiness tip #1)
No soaking, just rinse
Gently simmer 10 minutes in vinegar water (secret crispiness tip #2! And no, you can’t taste vinegar)
Shallow-fry twice
Skip to the Recipe | Video | Dozer
Background: Rethinking the french fry method
The conventional way of making french fries involves firstly soaking the raw fries in water followed by a double fry. This was (still is?) the way students were taught at cookery school and is still the default method used by many restaurants and pubs.
This method will yield crispy fries when they are piping hot, straight out of the fryer. But the first problem is that within minutes, before they even hit the table, they start to lose crispiness. I also found this classical method is heavily dependent on the potato. You get varying levels of crispiness depending on the potato quality and even season, as the starch / sugar levels of potatoes vary throughout the year. This is true even if you use the ideal variety of potato.
Well, this won’t-stay-crispy problem and unpredictability just won’t cut it anymore. So, old school method ditched. It’s time to look at modern methods with better and more reliable results!
Actually it’s not just me. Times have changed generally and restaurants around the world use all sorts of methods these days in pursuit of the ultimate crispy French fries. Some go to extreme lengths like triple or quadruple frying, overnight resting, or frying in pure beef drippings.
But we don’t need to dabble in any such tedious restaurant kitchen shenanigans. This method I’m sharing today is one that any home cook can do. It is adapted from Kenji Lopez-Alt’s french fries recipe from his iconic cookbook The Food Lab. It’s not particularly technical. But you do need to be comfortable frying in oil. That said, in this recipe we only shallow fry and not deep fry – always a bonus!
What you need
Here’s all you need to make your crispy french fry dreams a reality. Yep, this is all!
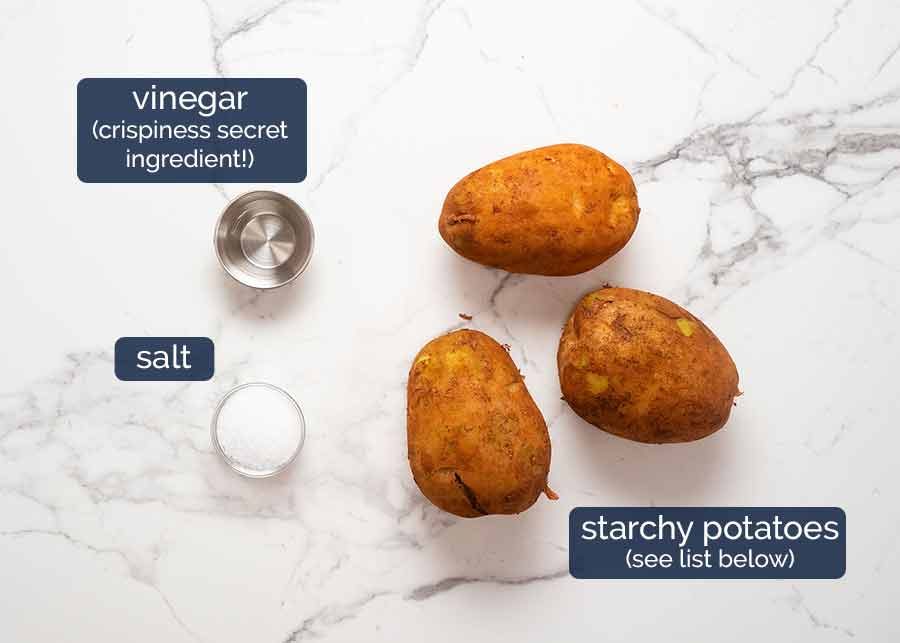
Potato – The type is important. Starchy, floury potatoes are the potatoes you need for crispy fries.
Australia: Sebago (the common dirty brushed potatoes you see everywhere)
US: Russet (also known as Idaho potatoes)
UK: Maris Piper or King Edward.
Vinegar – For simmering the potatoes, it is one secret weapon for perfect fries. There is no trace of vinegar flavour once cooked. See Step 4 below for the why.
Salt – For seasoning the water so the potatoes are seasoned all the way through.
Oil – For frying. I use vegetable or canola oil which are neutrally-flavoured oils. Re-using the oil: The oil can be re-used 3 to 4 times, or more. It won’t even need to be strained. Just cool, pour into jars and keep in the pantry, and have a browse in this recipe collection to decide what to make next!
How to make stay-crispy French fries
To get ahead or cook big batches, make the fries up to the end of Fry #1, cool then freeze until you’re ready to cook. Then do Fry #2 from frozen. Handy!
1. Cut fries
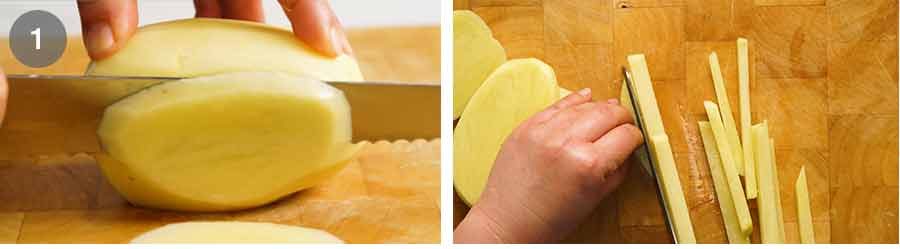
First, we have to cut our fries. A neat little crispy fries trick you may not have seen before: use a serrated knife to cut the potatoes. Though not visible to the eye, it makes the surface rougher therefore creating more surface area to crisp up = crispier fries!
What size to cut the fries: 6 mm / 1/4″ batons is the ideal size for optimum crispiness and fluffy insides. Thicker = less crispy. Thinner = not enough fluffiness inside.
How to slice: Cut a whole potato into 6 mm / 1/4″ thick slices. Stack 2 or 3 slices then cut into 6 mm / 1/4″ thick batons.
2. Keep in water to prevent browning
Keep cut fries in water to prevent them from browning as you continue cutting. No soaking time is actually required. A simple rinse followed by simmering the potatoes in vinegar water takes care of this for us.
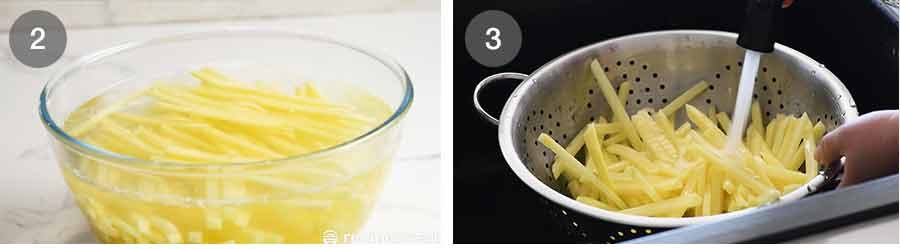
3. Rinse
Once all the fries are cut, place in a colander then rinse under tap water for 15 – 20 seconds. This is the first step to remove excess sugars from the surface of the potatoes (more on the “why” of this below, but in short it’s to aid crispiness – of course!). Meanwhile, the insides remain untouched by water so they’ll cook up nice and fluffy.
4. Cook in vinegar water = superior crispiness
Once the potatoes are rinsed, place them in a pot with cold tap water, vinegar and salt. Bring to a boil on high heat then immediately turn down to low so the surface is barely rippling. Cook for 10 minutes. See below for the “why” for this step!

What is the purpose of cooking in vinegar water?
This is the really clever part, a no-extra-effort step discovered by Kenji Lopez-Alt from Serious Eats which makes all the difference. There’s a lot of technical science behind the why, but in a nutshell:
Simmering the fries in water washes away the excess sugars that can cause the fries to brown too much before they have a chance to properly crisp up when frying
The water also activates the starches in the potato. Starch, when fried, is what creates that crispy surface we want!
Meanwhile adding acid (the vinegar) to the water prevents the potatoes from disintegrating for the 10 minute simmering time required. (Like how tart Granny Smith apples don’t turn into baby food mush when cooked whereas sweet red apples do.)
In case you are wondering, yes I tried variations like no-vinegar, shorter and longer cooking times, rapid boil versus gentle simmering. The vinegar water simmering method for 10 minutes works. Don’t skip it or shortcut it!
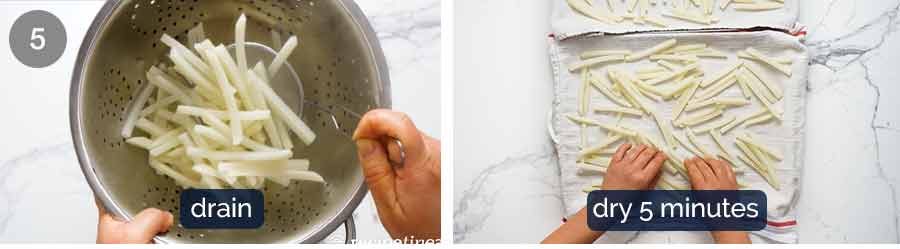
5. Drain and dry
Use a spider or large slotted spoon to remove the potatoes from the water into a colander. Then carefully spread the potatoes out on two tea towel-lined trays to steam dry for 5 minutes. No need to pat them dry, the residual heat will do the job for us.
6. Cooking vessel and oil
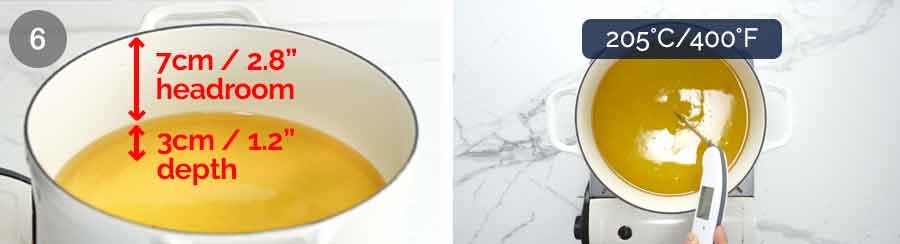
Cooking vessel – Use a heavy-based, large pot that is at least 10 cm / 4″ deep. We need:
Oil depth – 3 cm / 1.2″ of oil (1 litre/quart for the pictured 24cm / 10″ pot). It’s barely deep-frying, it’s more like shallow-frying!
Safety headroom – 7 cm / 2.8″ headroom above the surface of the oil for safety purposes as the oil bubbles up quite a lot when we fry. ⚠️ THIS IS IMPORTANT! Oil overflow is a real risk if you do not do this. It’s scary and dangerous, as I found out first hand! Learn from my mistakes. ☺️
Oil temperature – Preheat the oil to 205°C/400°F. Use a thermometer to monitor the temperature. I use a Thermapen, see my Essential Kitchenwares post for more details.
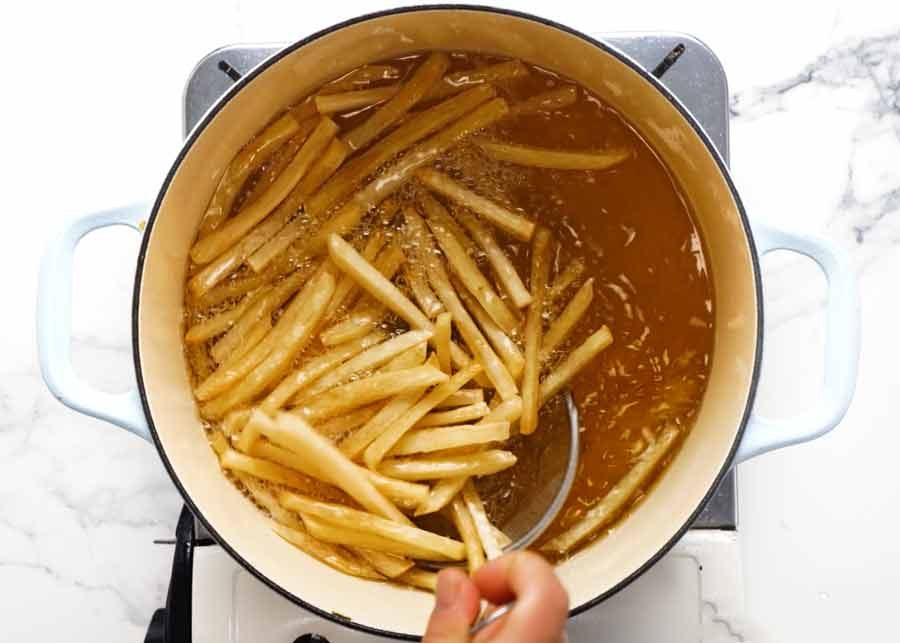
7. Fry #1
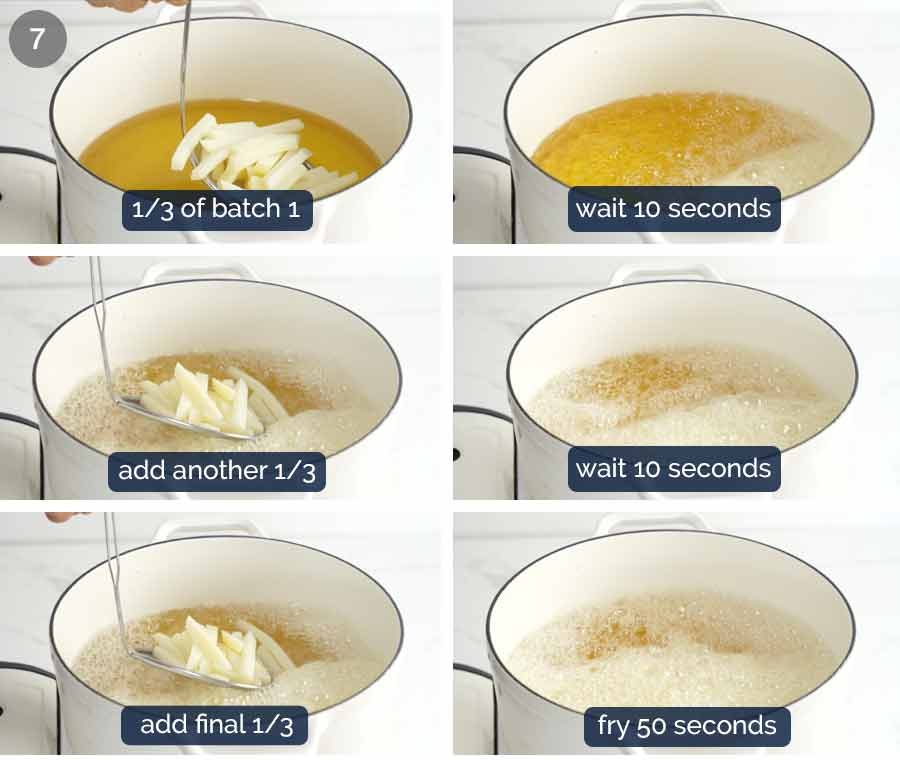
⚠️ IMPORTANT: For safety reasons, please follow the directions to pause 10 seconds between adding batches of more potato into the oil! As you can see in the photos below, the oil bubbles up quite high and vigorously as soon as you add some potato. If you add all the potato in one go, the oil will bubble up even higher and faster, which is risky. I’m speaking from first hand experience here!
Cook the fries in 3 batches – Separate the cooked potatoes into 3 even piles (batches). We will be doing Fry #1 in three batches in a 24 cm / 10″ pot. If your pot is larger or smaller, adjust the number of batches accordingly so all the fries in one batch can float in a single layer in the oil.
Add 1/3 of Batch #1 – Using a spider or slotted spoon, carefully add 1/3 of the first batch into the oil.
⚠️ WAIT 10 seconds then add another 1/3 of batch #1. Pausing before adding more fries is important to ensure the oil doesn’t bubble up too high. Use this time to load up, ready to add more fries.
Repeat – Wait 10 seconds, then add the final 1/3 of Batch #1.
Fry 50 seconds – Once all the fries are in, start the timer and fry for 50 seconds, moving the fries around once or twice.
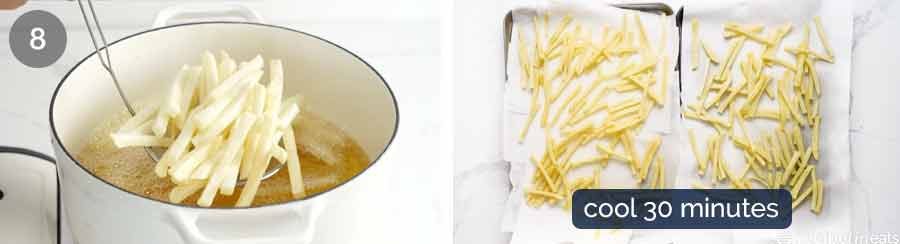
8. Cool 30 minutes
Remove the fries from the oil using a slotted spoon and spread onto a paper towel-lined tray in a single layer. They will be pale and not yet crispy.
Carry out Fry #1 for the remaining two batches using the same staggered approach (ie. 1/3 + 1/3 + 1/3) within each batch. Ensure the oil is back at 205°C/400°F before starting each batch. Then cool all the fries for 30 minutes on some paper towel-lined trays.
9. Fry #2 – crisp them up!
After cooling the fries, heat the oil to 205°C/400°F again. Now fry half all the french fries for 4 minutes until they are a gorgeous golden colour and wonderfully crispy.
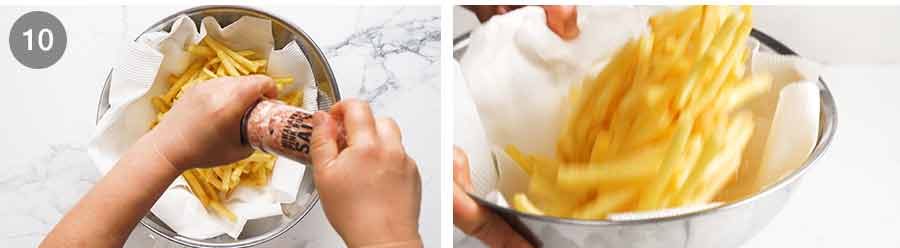
Remove with a slotted spoon into a large paper towel-lined bowl then repeat with the remaining fries.
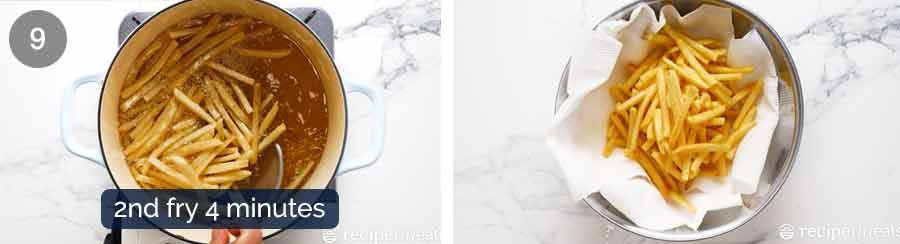
Why a bowl instead of tray to hold the fries? A bowl keeps the cooked fries warmer whilst still allowing for oil drainage. This way the first batch you cook will still be hot by the time you finish cooking the second batch. The bowl also doubles as a suitable tossing vessel once sprinkled with your favourite seasoning, as you’ll see later!
How to cook lots of fries and serve them all hot? Completed fries can be flash-fried for an extra 30 seconds to 1 minute to reheat. This way you can serve up all the fries piping hot!

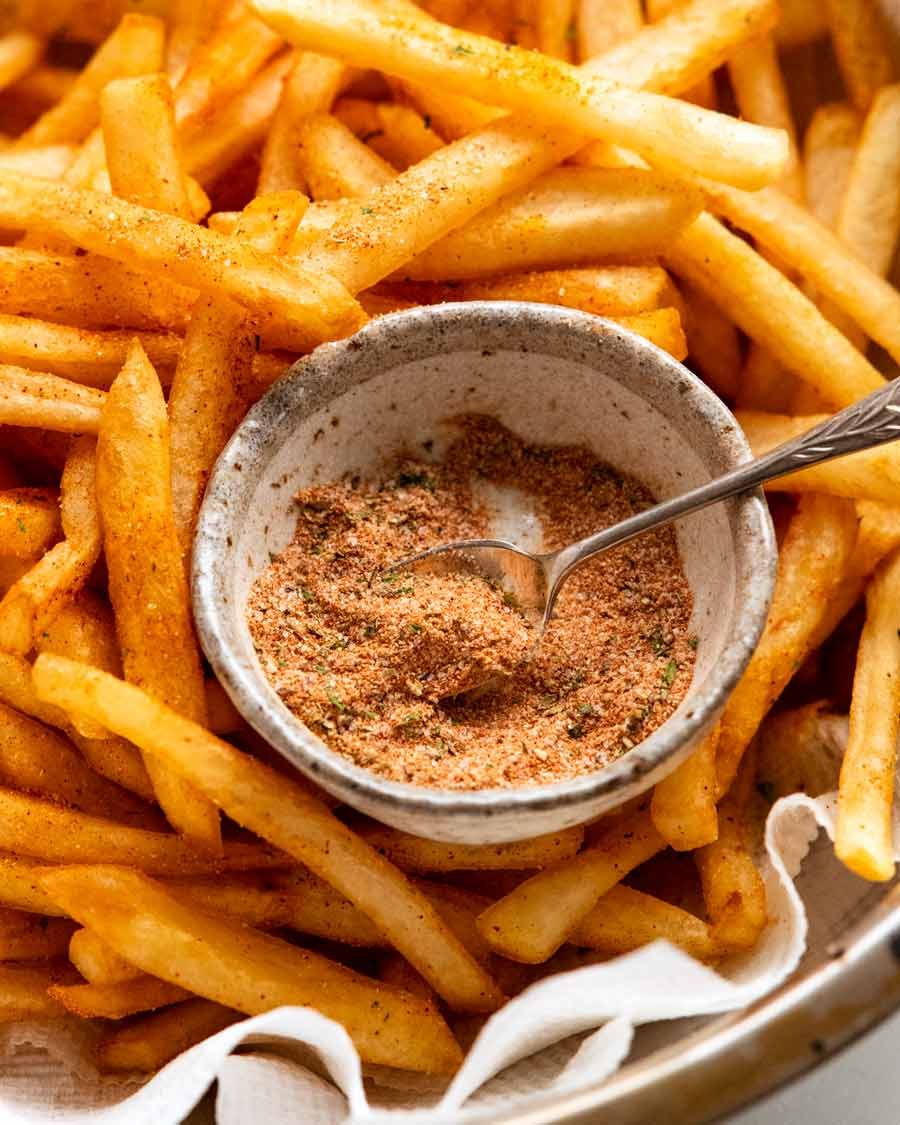
10. Seasoning!
Now that your fries are done, sprinkle with salt or your favourite fries seasoning while hot so the salt sticks. Toss, then serve! Remember, these fries will stay crispy for more than 15 minutes, though of course they are best consumed piping hot!
Tip: Remember these French fries are also pre-salted inside because we blanched them in salted water. So don’t go too crazy with the seasoning salt. Sprinkle judiciously, taste (I know, I hate to ask that of you), and then sprinkle more if you think it needs it.
Seasoning options:
Salt – table salt or sea salt flakes. Larger-grained cooking or kosher salt doesn’t stick as well.
Rosemary salt (recipe) – made with fresh rosemary. My favourite!
Fries seasoning (recipe) – a savoury fries seasoning blend. Addictive!
Nori seasoning (coming soon) – made with finely ground nori (dried seaweed). Très trendy!


Phew!
I know that’s a lot of information to digest for just some bits of fried potato 😂. But for this recipe, I thought some people might find the why behind certain steps interesting (we tested these fries a LOT!!!). Also, I want to give everyone the confidence to try this even if you aren’t experienced frying in oil. Remember, these chips are shallow-fried not deep-fried! Shallow-frying is easier, cleaner, safer and less resource-intensive than deep-frying – all good reasons why you should give this a go. ☺️
Truly worth making
I know frying is something that many people are not so comfortable with, or at least gives pause to wonder if it’s worth all the effort.
These fries? Hand on heart, they are worth the effort! It is rare to find fries this good even at really up-market bistros and restaurants, never mind the money you’ll shell out for them. Maccas fries (McDonalds, to you non-Aussies!) are incomparable – they’re dry and tasteless compared to homemade. Believe me – my memory is still fresh from when I ate them side by side as a test yesterday! 😂
I really hope you try these one day, so you get to experience the rare pleasure of truly amazing french fries, cooked fresh in your own home. And if you do, share your thoughts in the comments below. I’d love to know what you think – especially all you french fry connoisseurs!! – Nagi x
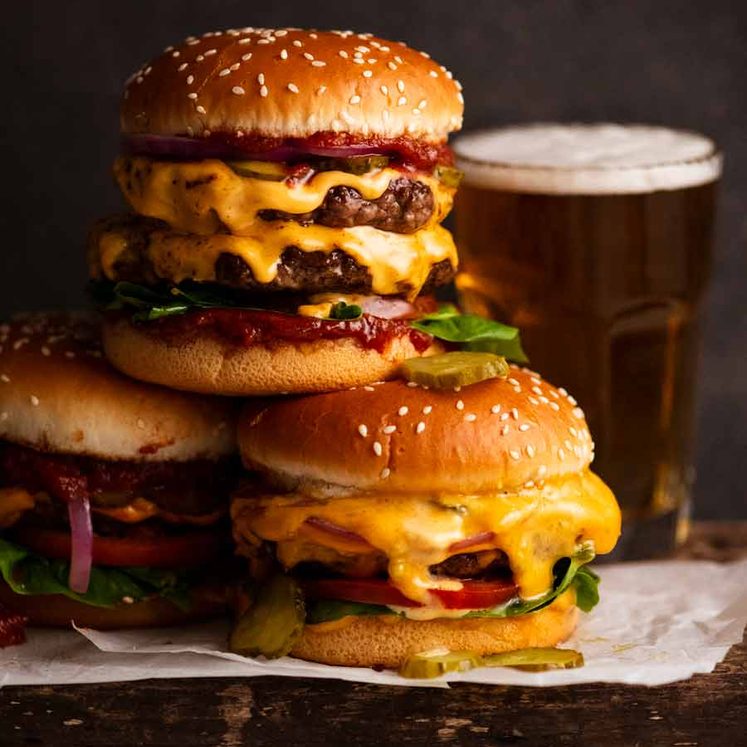
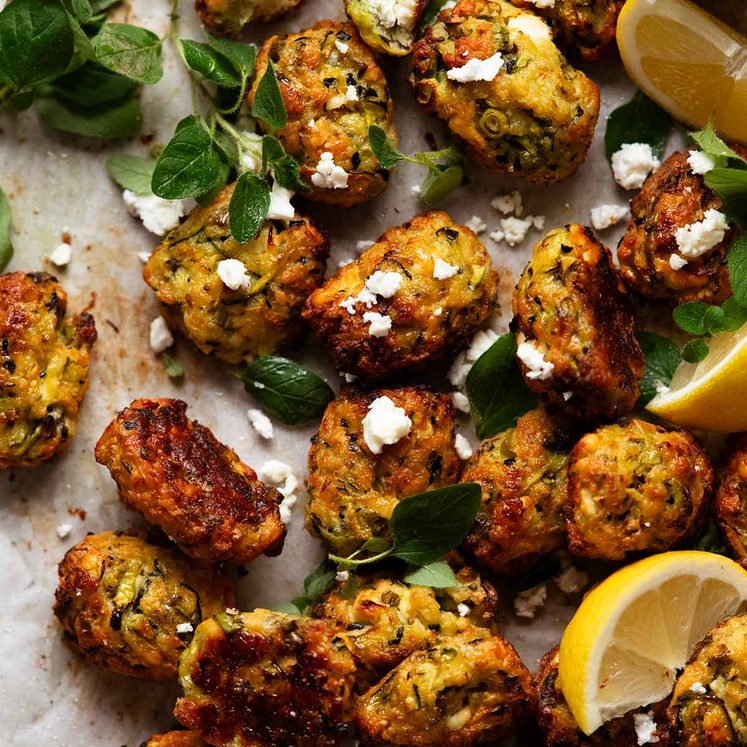
Serve with…


Watch how to make it
Hungry for more? Subscribe to my newsletter and follow along on Facebook, Pinterest and Instagram for all of the latest updates.
Perfect Crispy French Fries
Ingredients
- 1 kg / 2 lb (3 – 4) floury potatoes (Note 1, Aus: Sebago/dirt aka brushed, US: Russet/Idaho, UK: Maris Piper, King Edward)
- 2 tbsp white vinegar (Note 2)
- 1 tbsp cooking salt / kosher salt (Note 3)
- 1 litre/quart canola/vegetable oil
Seasoning (choose):
- Salt – table salt or sea salt flakes
- Shaker fries seasoning
- Rosemary salt
- Nori salt (coming soon)
Instructions
- Cut: Peel the potatoes. Cut into 6 mm / 1/4" French fries using a serrated knife. (Note 4)
- Keep cut fries submerged in a bowl of water to prevent them from going brown while you cut the remainder. (No need for actual soaking beyond this.)
- Rinse: Transfer potatoes to a colander and rinse under tap water for 15 – 20 seconds.
- Simmer: Place fries in a large pot with 2 litres/quarts of cold tap water, vinegar and salt. Bring to a boil over high heat then immediately reduce stove to low so the surface is rippling gently (Note 5), not big bubbles. Cook for 10 minutes then carefully remove using a slotted spoon into a colander (do not tip into colander, fries will break).
- Dry 5 min: Spread the fries on 2 tea towel lined trays. Leave to steam dry for 5 minutes.
- Pot: Pour 3 cm / 1.2" of oil in a pot that is at least 10cm/4" high (⚠️for safety, need at least 7 cm / 3" from oil surface to rim of pot, Note 6)
- Separate the fries into 3 Batches (for cooking).
Fry #1
- Heat oil to 205°C/400°F over medium high heat.
- ⚠️10 sec pause (Note 7): Lower 1/3 of Batch 1 fries into the oil using a slotted spoon. WAIT 10 seconds, add another 1/3 of the fries, wait 10 seconds, then add the remaining Batch 1 fries.
- 50 sec fry: Fry for 50 seconds, moving them around once or twice. Then remove with a slotted spoon onto 2 paper towel lined trays, spread out in a single layer. The fries will still be white and floppy.
- Repeat Fry #1 with Batches 2 and 3, ensuring the oil is back at 205°C/400°F before cooking.
Fry #2
- 30 min cool: Leaves fries to cool for 30 minutes.
- Line a large bowl with paper towels – for draining and tossing.
- Fry #2: Heat oil to 205°C/400°F. Fry half the French fries for 4 minutes, moving them around twice, or until golden brown and crispy. Drain in the lined bowl, then repeat with remaining fries.
Season & serve!
- Sprinkle fries with salt or seasoning or choice. (Note 8) Toss and serve!
- Fries will stay crispy even once cool. See note for large batch cooking tip.
Recipe Notes:
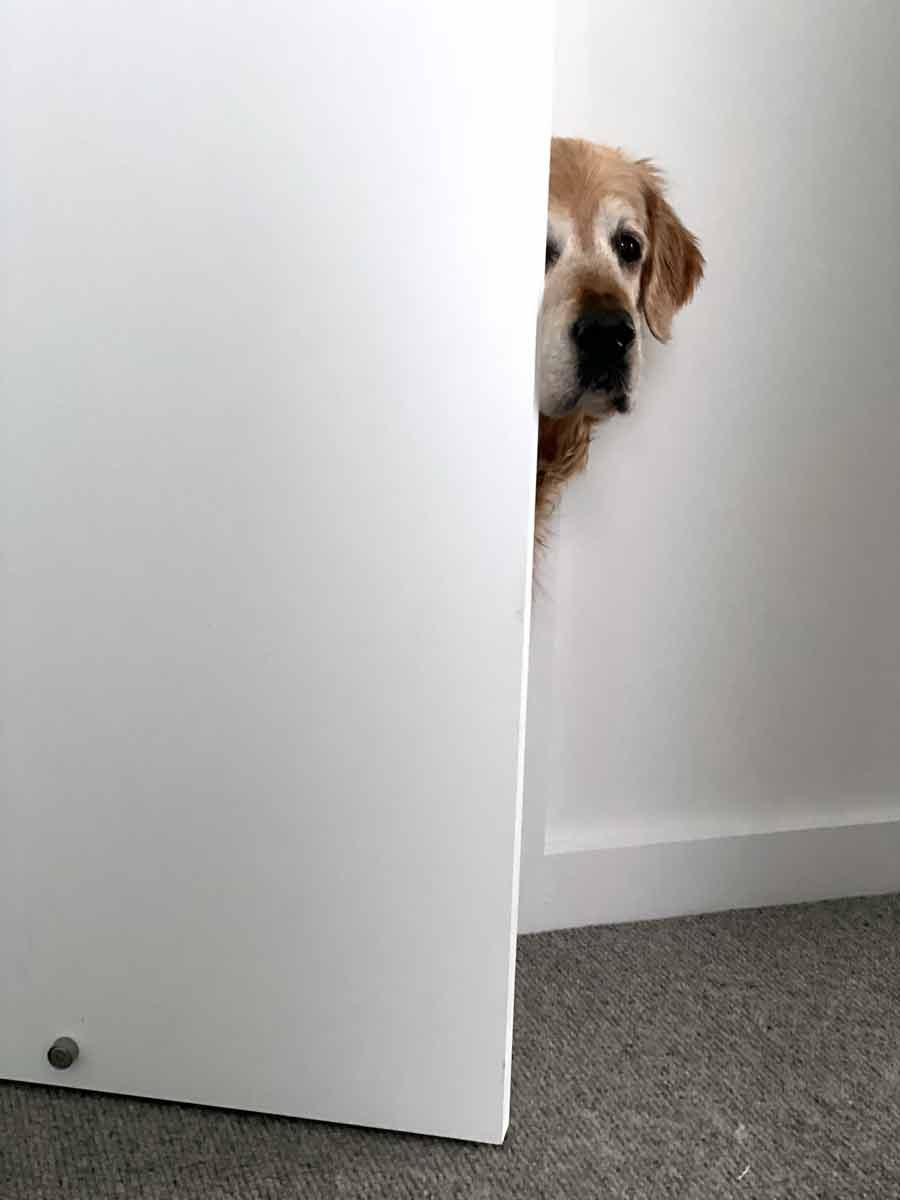
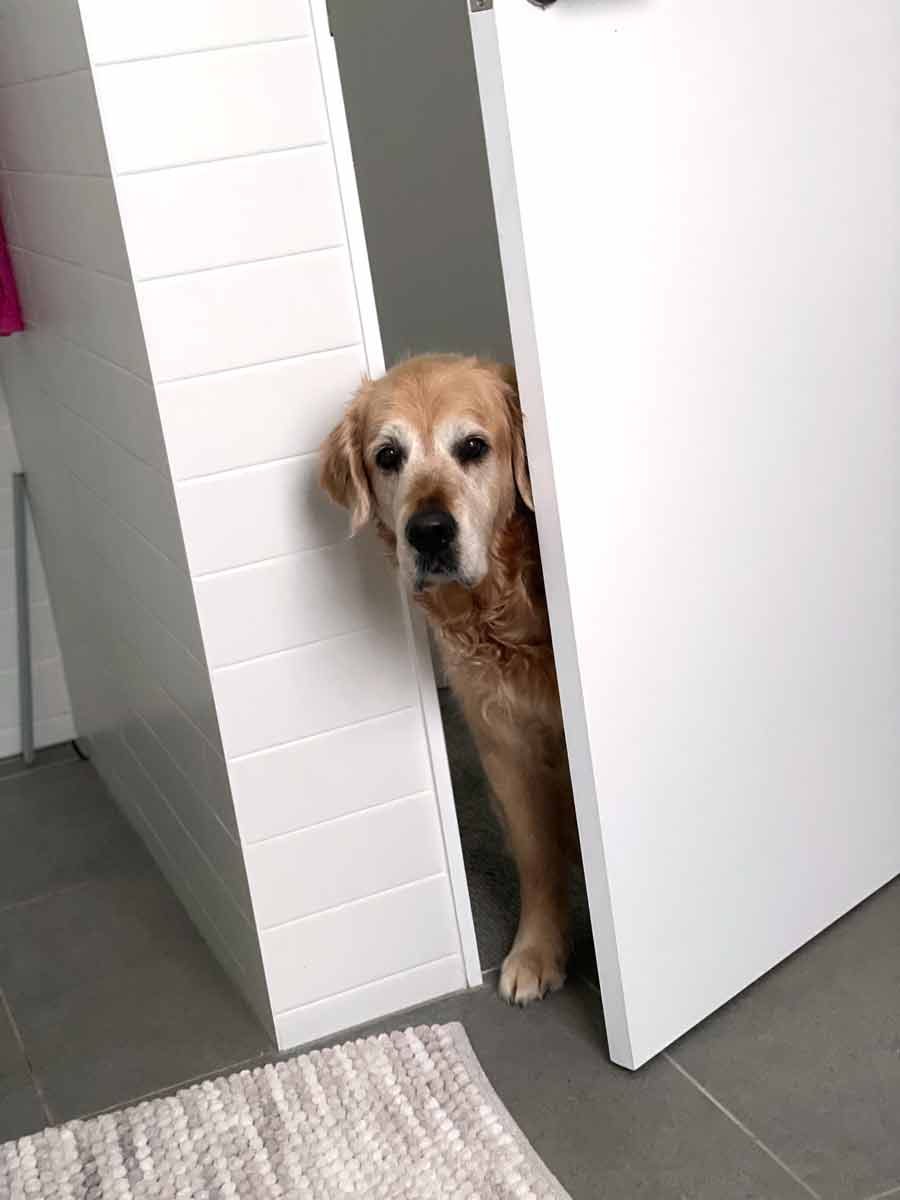
Life of Dozer
Behind every door, there’s a Dozer….
After the first cook can I freeze the fries and do the second cook the next day?
Yes, you can! I do this each time I make a batch because I make so many. My partner says they are better after they’ve been frozen. I follow Nagi’s directions for cooling after the first fry, freezing, and reheating.
I love the explanation and reasoning, a lot of times this is missing in recipes! Can’t wait to try these!
Thanks for sharing!
PERFECT. Followed recipe exactly, and everyone loved them. Thanks for finally making homemade fries a raving success!!
10/10 recipe. I love salt and vinegar chips so for the vinegar step I did half vinegar half water and it gave such a great flavour to the chips!!
Turned out perfect. They’re a labor of love but 100% worth it. Will be making again!
These are so good. I froze some last time and they turned out amazing!! My kids said best fries they have had. Thank you for the recipe 😀
Excellent! I used this recipe to christen my new deep fryer. I even dusted off my mandolin for the occasion. Best fries I ever made. I can’t wait to make the next batches with your different salts. Thanks for sharing!
These are seriously amazing. So crispy and delicious. (Crazy how science works!). Worth the effort. I served them with medium rare steak and Nagi’s Paris Butter. So good! Next time I’m making several batches and freezing them for a quick 2nd fry at a moment’s notice.
Easy to follow instructions and my chips turned out perfect! I attempted to make some “U” shaped chips that we recently ate in Italy, and this recipe created a pretty close imitation! Thanks Nagi!
Excellent!!
Follow the instructions… they are lengthy but easy enough. The end product is worth it! They are perfect!
Yes!! We made these today at our campsite. Perfect French Fry recipe. Thank you for sharing!
10/10!! This recipe is the bomb! Hands down – the best french fries we have ever had! Don’t miss a step, yes there are many, albeit all easy, but all important to get the fantastic results: soft in the middle and super crispy on the outside. A keeper!
I just tested this recipe and I followed it to a T. It worked great. I will be making a lot more of these. They are the best fries I have had in a long time. Most of the restaurants near me make fries that are soggy, wimpy etc. These were crisp and tasty. I did use a potato cutter instead of the serrated knife. It was much easier for me. For seasoning I used a salt and vinegar seasoning pack on them (it’s from Walmart for wings) and I couldn’t stop eating them. I do have a question would this recipe work for sweat potatoes as well or would that be different?
FINALLY!!!
Crispy homemade fries ❤️
Has anybody trued making these by boiling the water in a kettle first as opposed to straight cold tap water as its been 50 mins and I’m still waiting for it to boil. It’s not feasible
I have found this to be an issue with some gas stoves and thin pots, especially if you have a fan in the kitchen or hood over your range that’s moving the air around near the cooking surface. Quality thick bottomed pots can help with this, cutting down on air movement near the stove top, or simply putting a lid on your pot can all help with this.
Whenever I cook at my wife’s aunt’s house, she has thin aluminum pots and a rather weak gas stove, and it’s nearly impossible to boil water there without using a lid on those pots.
At home I have a potent glass top electric range and thick-bottomed steel pots and have zero issues, and when I had gas ranges previously, the thick-bottomed steel pots worked quite well. Thinner pots and aluminum pots don’t retain heat well enough to keep the water at a solid boil.
Also, and this seems counter-intuitive, but if you are using gas to cook, be mindful of the width of the flame compared to the width of your pot: turning the flame up all the way may be counter-productive if the flame spreads towards the edges of the pot. You might be losing more heat around the side of the pot instead of transferring heat into the pot/water, so it might boil faster by turning the flame down a bit to make sure more flame is making contact with as much of the bottom of the pot as possible and not simply being pushed away and around the sides of the pot. A higher flame setting does not always mean more heat is being transferred into the pot or its contents.
tl;dr: use a lid on your pot.
Thanks for the advice Justin. I haven’t made them since but I’m tempted to give them another go as they have great reviews. I will keep your comments in mind. I do have a gas stove and I think next time I’ll use boiled kettle water first and hope that works. (Wasn’t sure whether to take the recipe literally when it said to place the fries on cold water).
Mel, did you bring the water to the boil before turning the heat down to low?
Hi Coralie yes I waited and waited to for the water to come to a boil but it never did.. I presumed it must’ve been down to the vinegar.. the only thing I did was double up on the recipe so put double the water and double the vinegar and after an hour I gave up and took the fries out but by this point some were mushy.. do you think k it would be a problem to just put them in boiling water from the kettle or do they have to go in from cold?
PERFECTLY CRISPY, BETTER THAN MCDONALD’S FRIES. HOWEVER, it took FOREVER to make. And my fries tasted a little like vinegar. (Which some people liked, think salt and vinegar chips)
I pretty much triple fried these bad boys. Made 10lbs of potatoes, ALL GONE in minutes as I was frying them up. This is now my go to French fry recipe. 10/10
Do you mean for the last fry you can use the air fryer?
I made this and my husband and daughter loves it and said it tastes better than fastfood! 😂😂😂
I did not wait 30 mins for cool down, instead I put it in the freezer for like 5 mins to speed up the cooldown process 😂
Followed to a T. Didn’t work for me. IF they cooked #2 at 4 min,, outside was crispier, but inside had disappeared. Gone. Disintegrated. Much browner in appearance that photo. Not crispy unless I practically burned them. Oil was 400º. Still searching for that perfect fry recipe!
I’ve noticed some potato varieties react the way you described – if you are truly following to a T then try different potatoes! I use brushed potatoes and follow as closely as I can (I use a deep fryer that is limited to 190C) and they are the best fries we have ever eaten every time
They came out perfectly was wondering after first fry if u can freeze then use at a later date ?