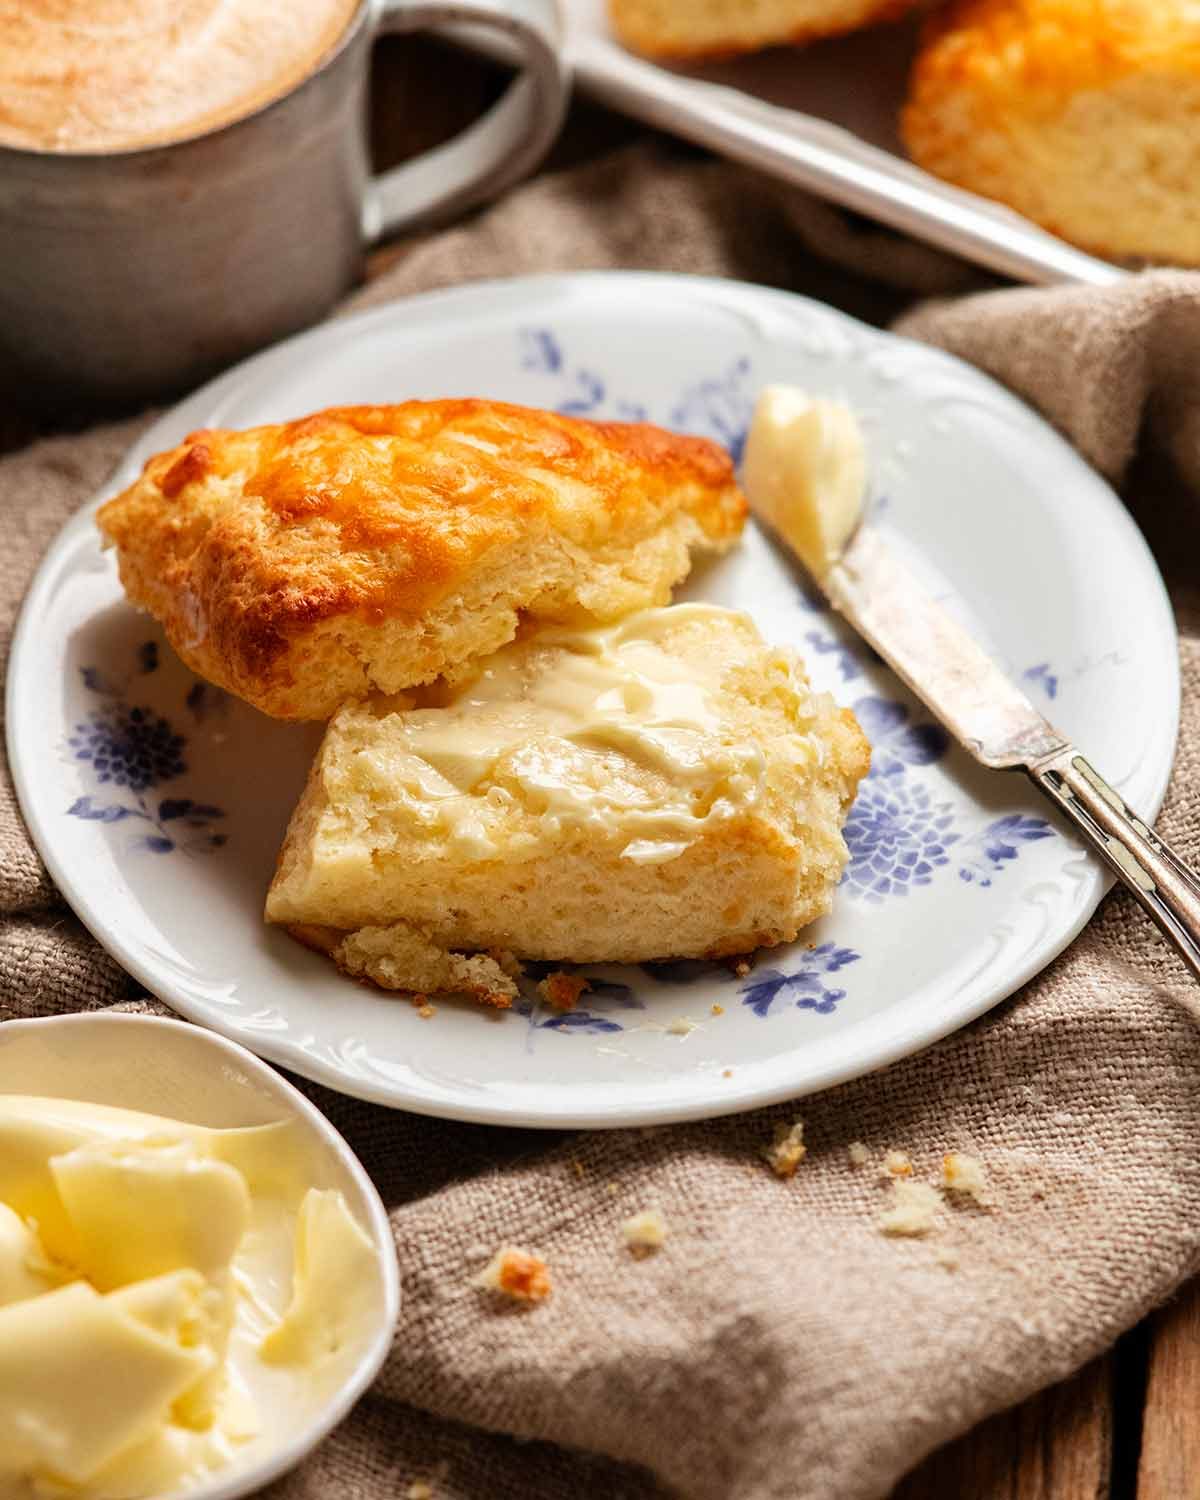
As much as I love traditional jam and cream ones, these savoury cheese scones have my heart…. does it surprise anyone that I make mine extra cheesy? 🙂

Cheese scones need to be a thing!
Savoury scones feel like the next big thing in Australia. Just like savoury muffins once were. Say “muffin” and most think blueberry….. I think cheese. 😅
Thus, I’ve been delighted to notice in recent years the increasing presence of savoury scones at bakeries around town, especially at local markets. Take everything you love about traditional scones – flaky, fluffy, tender, warm – and add cheesy goodness with extra crispy, cheese crusted craggy edges. It’s a home run!
And while Aussie scones are usually round, I’ve gone American-style wedges here so I could make them bigger, with crunchier edges (those corners!) and faster – no ring cutters needed.


Ingredients in cheese scones
Heads up – I make mine extra cheesy. There’s 200g/2 cups of cheese to 1 3/4 cups of flour (260g). It is not typical to see the ingredients skewed so heavily towards cheese. But my theory is that if we’re making cheese scones, I want to be able to taste the cheese! Else I’d rather make plain ones. 🙂

Plain flour (all-purpose flour) and baking powder – While traditional scones call for self-raising flour, I prefer plain flour with added baking powder for cheese scones. This way I can add enough baking powder to give the dough extra lift to counter the weight of all that cheese (what an excellent problem to have!). Also, as a general rule, self-raising flour isn’t as effective as combining flour plus baking powder (rule of thumb is 2 teaspoons baking powder for every cup of flour).
Cheese – Cheddar is my default, though tasty cheese (an Australian favourite) works well too. Actually, any good melting cheese that can be shredded works – just avoid mozzarella (not enough flavour). For punch, use sharp vintage cheddar, for milder, try Swiss, for premium I splurge on gruyere.
Pre-shredded is fine (rare endorsement!), I like Devondale’s 3-cheese blend (mozzarella, colby, parmesan).
Cold unsalted butter – Cold butter is key to that signature flaky texture and soft, fluffy interior. It’s best to cut it into smallish pieces so it cuts easily and evenly into the flour.
Milk – Full fat milk is best though low fat works as well. I haven’t tried with non-cow milk but I don’t see why it wouldn’t work.
Salt – These scones benefit from a decent amount of salt. I use 1/2 teaspoon of cooking salt / kosher salt. If you only have fine table salt, use half the amount. For sea salt flakes, increase to 3/4 teaspoon.
Extra add in options – You’re only limited by your imagination! If you’ve got leftover pickled jalapeños from the B85 Beef Sausage Rolls, they’d be a brilliant addition. Sun dried tomatoes, olives, chives, green onion, bacon, ham, even chopped pickles!
Actually, the idea to share a cheese scones recipe came about when I made cheese, bacon and green onion scones. I brushed the tops with bacon fat for extra bacony goodness! I’ll share these next. 🙂


How to make cheese scones
The key to flaky, fluffy scones is cutting cold butter into flour which creates tiny fat pockets that melt and steam as the scones bake. A food processor makes seriously speedy work of this – plus you avoid the risk of melting the butter with warm fingers which makes the scones chewy and greasy.

Blitz – Put the flour, baking powder and salt in a food processor fitted with a standard “S” blade. Pulse once just to combine, then scatter the butter across the surface. Pulse 4 to 5 times until the largest butter pieces are about the size of a pea. Add the cheese and pulse once just to mix through.
Milk – Slowly pour the milk through the feeder tube while pulsing 8 to 10 times, until you can no longer see flour, then stop pulsing

Dough done! The scone dough might look a bit crumbly in the food processor but if you pinch it between your fingers you’ll see it sticks together. It should be a little bit sticky – wetter dough means more moist scones inside. Dry dough = dry scones = 😢.
Wedges – Bring the dough together in a ball then pat it into a 3cm / 1.2″ thick round disc on a piece of baking paper (parchment paper). Brush with milk, sprinkle with cheese then cut into 6 wedges.

Separate – Keep the scones on the paper and transfer to a baking tray. Then separate the wedges so they are 5cm/2″ apart.
Bake for 20 minutes at 200°C/390°F (180°C fan-forced) until golden on top. I find a slightly hot oven gives these a nice rise boost and beautiful golden cheesy crust.
Cool 5 minutes on the tray then attack!

And here’s a close up look at the inside. You’ll see in the video how soft they are when I give them a good squeeze!

These cheese scones are one of those baked goods that are at their absolute peak fresh out of the oven, when they’re puffed and golden, impossibly fluffy inside, the cheese crust is shiny and they’re still warm and steamy inside, waiting for you to gently pry them open and give it a (generous!) slather of butter.
But it’s ok! You don’t have to inhale all 6 in one sitting. They keep for 2 – 3 days, and though they will feel firm and dry (and they are, when cold), a quick 30 second microwave is all it needs for an immediate resurrection back to pillowy fluffiness inside. Hope you enjoy! – Nagi x
FAQ – Cheese Scones!
I have not tested this with gluten free flour though a reader left a comment below that she successfully made this with gluten free flour.
Scones are best eaten freshly made. Once cool, they start to lose freshness but keep for 3 days in an airtight container. However, they MUST be served warm to rejuvenate them! Beyond 3 days I find they are too stale.
I’ve dabbled in savoury scones in the past but didn’t buckle down to finalise a recipe until I decided it would be a great one to share. 🙂 The craving for a savoury cheese scone came about after a visit to the Orange Grove markets and enjoying one of the famous Brickfields Bakery Cheddar Chilli and Olive scones.
I will share a savoury scone with add-ins next time, but I wanted to figure out a plain cheese scone first. (Though – mind you – nothing plain about these scones!)
I used my classic jam-and-cream scones recipe as the base then added cheese. I knew the cheese would weigh it down (this is not the first cheese recipe this Cheese Monster has done!) so I used flour plus baking powder rather than self raising flour which we do in traditional scones, as it makes things rise better. Why? Because baking powder starts to lose its leavening power the moment you crack the seal, so when pre-mixed with flour the baking powder in it is not as effective as using it freshly measured out of the jar.
In fact, dead baking powder is all too often the cause for flat cakes, so much so that I shared a quick little tutorial for how to check if your baking powder is still good.
I also felt the scone could be a little more buttery – I think because with traditional scones, you get a good amount of wetness from jam and cream which is missing with savoury scones. So then I dialled up the butter, played around with the best shape (wedges = more crunchy edges than cutting rounds plus faster to make plus larger = bakes long enough to get nice crunchy cheese edges).
And 5 goes later, I was done! Wrote it up, filmed the recipe video, got JB to make it – and his were slightly underbaked in the middle because I made a typo with the oven temp (I wrote 170C instead of 180C fan) – which meant I made it again the morning I published this post to double check it.
Then that afternoon I made it again to film a social media recipe reel – you can watch it here on Instagram.
So, all up for this recipe, I think I made it 8 times leading up to share this recipe. 🙂
I prefer using a food processor to make scones not only for convenience but also because I find when I do it by hand, my hot little fingers tends to melt the butter a bit as I rub it into the flour. So the scones are never as flaky, light and tender as they are when made with a food processor. Still good – but they really are better with a food processor!
This is because scones rely on a gazillion teeny tiny little cold butter bits inside the dough to create steamy pockets in the dough as it bakes, which makes the scones rise. If the butter is softened, it blends into the dough instead so you don’t get those little air pockets, which leads to a denser scone.
Yes, absolutely! Use a pastry cutter if you’ve got one (a handheld tool made especially to cut butter into flour, the same effect as blitzing it with a food processor) or rub the butter in with the tips of your (cold!) fingers.
Cup sizes differ slightly between the US (1 cup = 236ml) and the rest of the world (250 ml). While the difference is not enough to make a difference in most recipes, for some baking recipes it can mean the difference between success and failure.
You do not have to adjust for cup size differences in this recipe as I have already factored it in.
I made this recipe using US and Australian cups, and the weights provided and the end result is the same. This is because even though 1 3/4 US cups of flour = 210g rather than the 260g in the recipe, the milk is also less by the same ratio. So the liquid to dry ratio ends up the same, so the dough has the same consistency and recipe comes out the same!
Another measurement inconsistency factored into this recipe is tablespoon measure inconsistencies. I’ve specified 3 teaspoons of baking powder instead of 1 tablespoon because Australian tablespoons are sometimes 20 ml, whereas the standard in most other countries is 15 ml.
Teaspoons, on the other hand, are consistently 5 ml worldwide, or within a very small range of this which is close enough for home baking purposes (for example, 1 US teaspoon = 4.92ml to be exact).
This recipe would still work fine most of the time if someone were to make it with a 20 ml Australian tablespoon of baking powder. But some brands of baking powder have an awfully strong metallic flavour so when you use too much (and 20 ml is 5 ml – or 30% – too much), you can taste it. Not all the time, but sometimes.
Easy way to avoid this problem and ensure everyone has the same successful outcome? List baking powder as 3 teaspoons instead of 1 tablespoon. 🙂
Watch how to make it
Hungry for more? Subscribe to my newsletter and follow along on Facebook, Pinterest and Instagram for all of the latest updates.

Cheese scones
Ingredients
- 1 3/4 cups plain flour / all purpose flour
- 1 1/2 cups shredded cheddar or tasty cheese (packet shredded ok, tightly pack the cups!) (Note 1)
- 3 tsp baking powder (Note 2)
- 1/2 tsp cooking salt / kosher salt (halve for table salt, +50% for flakes)
- 100g (7 tbsp) unsalted butter, cold, cut into 1 cm cubes
- 3/4 cup milk , cold, plus a little extra for brushing (preferably full fat)
Topping / serving:
- 1/2 cup shredded cheese , for topping
- Butter , for spreading
Instructions
Abbreviated recipe:
- Pulse dry ingredients once, butter 4 times, cheese once. Add milk while pulsing 8–10 times. Shape into 3cm / 1.2" thick disc on baking paper, brush with milk, top with cheese, cut into 6 wedges. Space 5cm/2" apart on tray. Bake 20 min at 200°C/390°F (180°C fan), rest 5 min.
Full recipe:
- Preheat oven to 200°C/390°F (180°C fan-forced).
- Blitz dry – Put flour, baking powder and salt in a food processor with a standard "S" blade. Pulse once. Add butter, pulse 4 to 5 times until the largest butter pieces you see are pea size. (You can also do this by hand – see Note 3)
- Add cheese, pulse once just to mix through a bit.
- Pour milk through the feeding tube while pulsing 8 to 10 times until the flour is just incorporated, then stop straight away. The dough will be shaggy rather than smooth, and it should be a bit sticky but can be handled.
- Bring dough together – Scatter a work surface with 1 tsp flour. Scrape the dough out of the food processor then bring together into a ball with your hands. Try to avoid using extra flour, but dust with more if needed (I don’t).
- 6 wedges – Put it on a sheet of baking paper, pat and shape into 3cm / 1.2" thick round disc. Brush with milk (top and sides), sprinkle with cheese, lightly press in. Cut into 6 wedges. (Note 4 for rounds)
- Bake – Transfer to baking tray. Pull each wedge out a bit so they are 5cm/2" apart. Bake 20 minutes until the surface is golden.
- Cool 5 minutes on the tray, then enjoy warm with a smear of butter!
Recipe Notes:
Nutrition Information:
Life of Dozer
Getting Doxer fitted out in his tux for the Mum Cha RecipeTin X Plate It Forward reader lunch tomorrow!

The vision in my head is always better – in reality, the tux always sits a bit wonky, wrinkles quickly and he never looks very happy! Flattened ears are a dead giveaway. He likes being naked! 😂

Dozer looks adorable albeit unimpressed….but he will do you proud no doubt..
What’s a cheese scone without cheese overload a plain scone worthy of cream and raspberry jam.
Sunday morning brunch….can’t wait
Have an awesome weekend Nagi and Dozer ❤️❤️❤️
Hi, yummmmm. These scones insanely delicious . I knew a lady who used to make incredible cheese pancakes/hotcakes. My sister makes the most amazing cheese scones with her husbands smoked cheese. Love you Love Dozer and your recipes always blow me away
tux or naked, dozer is mega cute, i just wanna hug him n play with him all day
i agree no point in cheese scones if you cant taste the cheese, they look so tasty
typo: doxer? i think you meant dozer, not like you to make a mistake esp on his name
Yum! Savoury scones have always been a staple at cafes across New Zealand. It’s one of the things the amazing cafe culture in Australia has been missing!
(Along with creamy mushrooms on toast and mince on toast with a poached egg – two other kiwi cafe classics!)
My dear old Nan used to make cheese scones religiously..my Uncles always joked they used them as burly when they went fishing, fond memories
And Dozer you look adorable as usual
Yum!!
The perfect weekend breakfast! I’ll be trying your recipe for sure! I usually make the classic cheese scones from the Edmonds cookbook (I’m in New Zealand). I never thought of adding more cheese. I’m looking forward to it!
Great recipe, very similar to hand me down family recipe. I always use a preheated baking sheet/tray. Have you tried this approach? Plus usually add some mustard powder or cayenne pepper for additional deliciousness. Thank you for sharing
Oh my goodness, that sounds delicious! I am absolutely going to do the mustard powder. Thanks for the tip!
Hi Emma
I came on to post more or less the same as you:
1) preheat tray in oven (without baking paper)
2) work as quickly as possible, including warming the milk and adding it all at once
3) always added cayenne, some parmesan (deduct same quantity from other cheese) and cracked black pepper.
Top tip for the best cheese scones is to work super quick as soon as the milk is in the mix, and put the baking tray in the over while heating so it’s piping hot and the bottoms get nice and crunchy.
Scones are not usually ‘my thing’ but I just love the look of these . . , the pull of that extra cheesy taste and their look on your plate! Am off to talk to Mr Google about that Devondale cheese blend – methinks I would enjoy that elsewhere as well! Thanks!!! Hmm – Dozer – go look in the mirror – that bib-and-tucker is just fine compared to some of what has been on offer ai other times 🙂 ! Pretty handsome, honest !!!
Great scones Nagi. You never seem to get it wrong xxx
Driving home with my hubby. Stuck in horrendous traffic. Saw this recipe just dropped in my inbox. Quick look at the ingredients & the video… yum!
Just shared it to my teenage sons to get cheesy scones on the go – I often get my boys to cook your recipes Nagi as you make them so easy to follow! Looking forward to getting home to the smell of cheesy baked goods & my 2 beautiful boys… hopefully they haven’t devoured them all before we arrive! 😁
These are delicious. Great with buts of bacon in them too. 🤤
Oooooooohhhh These looks so good! Will be giving them a go tomorrow for sure.
Thanks Nagi x